The workspace
Everything in MarkupRight happens in one window. Learn its parts once and every feature in this guide will be easy to find.
- You'll learn
- What each part of the window is for, and how to open, move and hide panels.
- Fastest way to anything
- Help ▸ Find Tools + Commands Ctrl+K
- Lost a panel?
- View ▸ Reset Panel Layout
A tour of the window
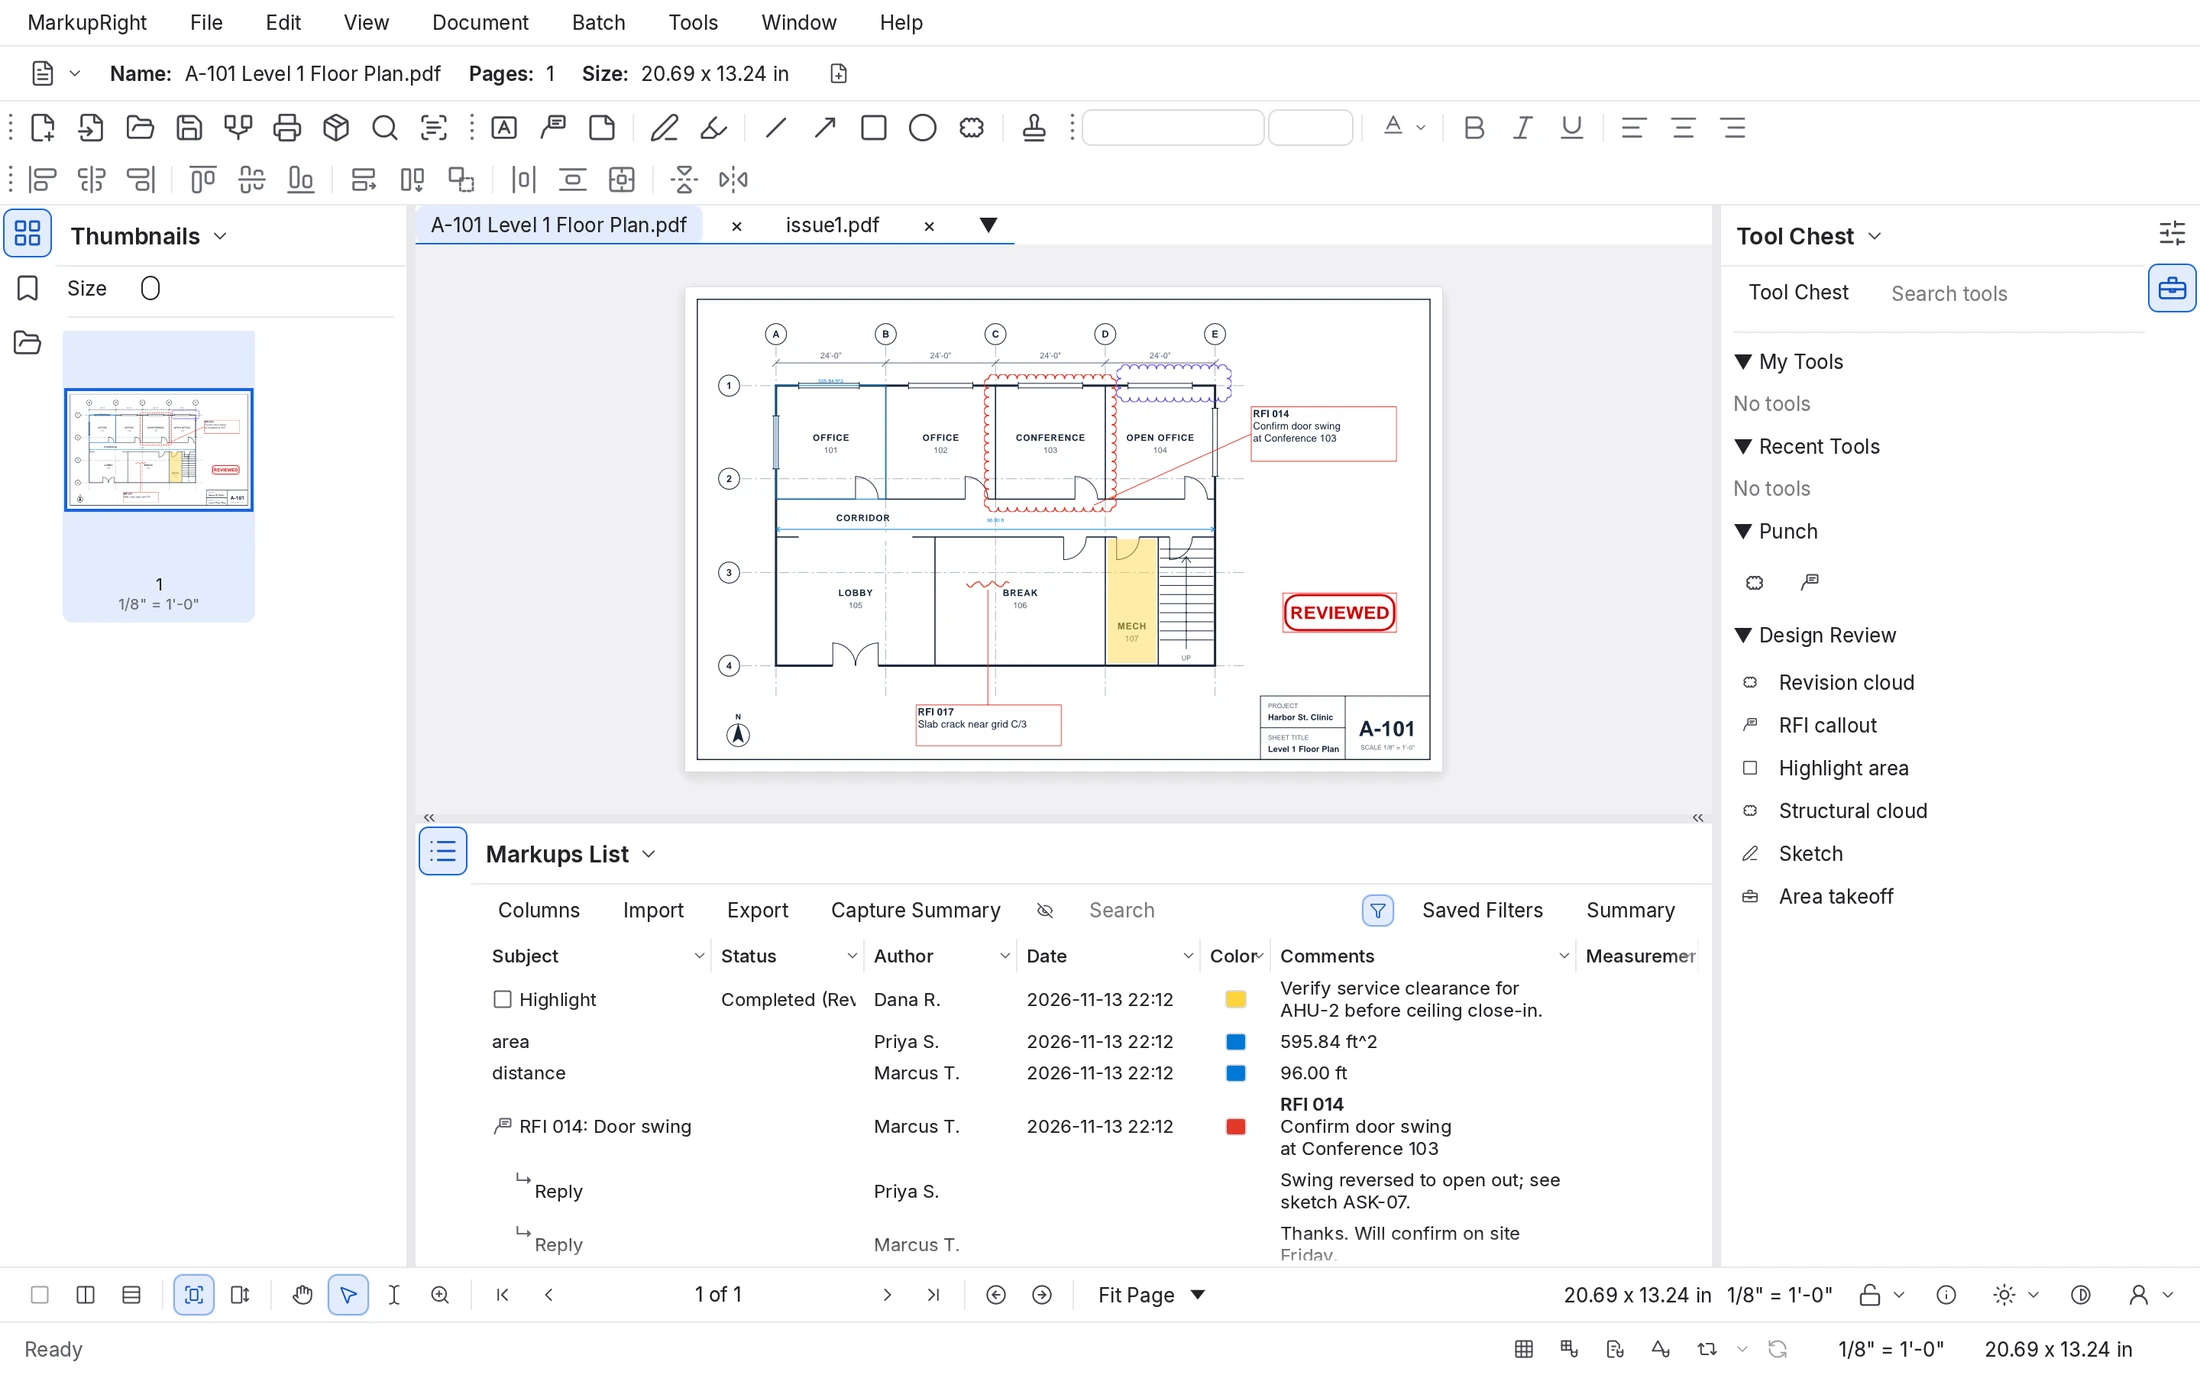
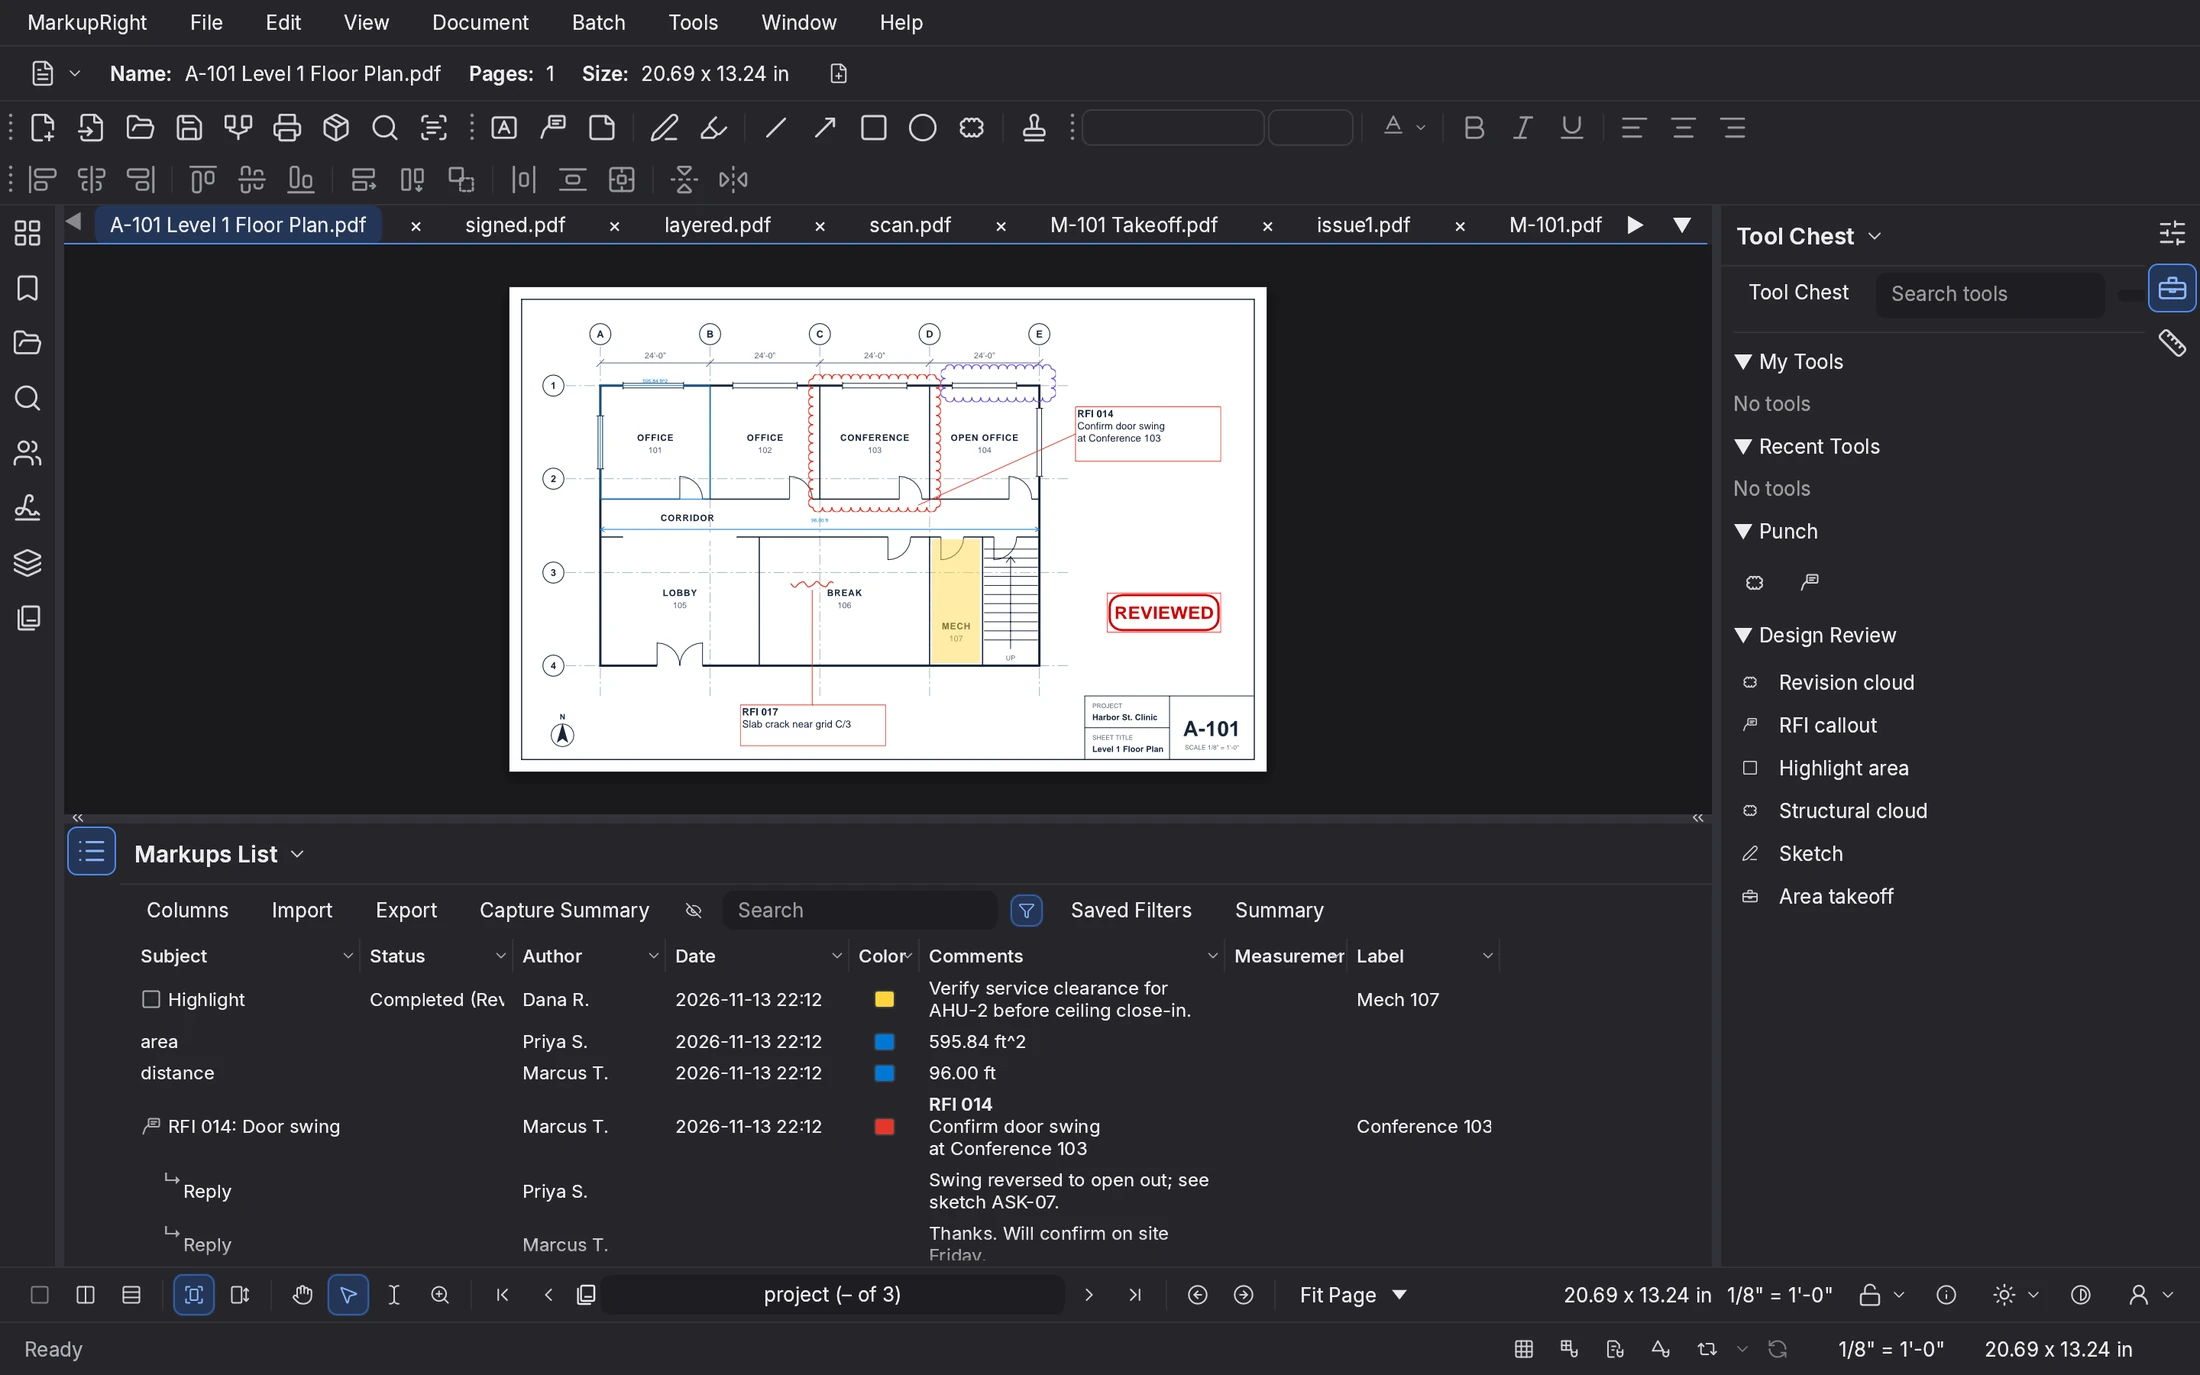
This is MarkupRight with a floor plan open. The numbers match the list below the picture.
 1
2
3
4
5
6
7
8
9
10
- Menu bar. Every command, in nine menus: MarkupRight, File, Edit, View, Document, Batch, Tools, Window and Help.
- Properties toolbar. Changes with what you're doing: document details, the selected markup's look, or a web address.
- Toolbars. One-click buttons. File, Markup, Font and Alignment are shown at first.
- Document tabs. One tab per open file. A dot after the name means unsaved changes.
- Left panels. Thumbnails, Bookmarks, File Access, Search and more.
- Document view. The page you're working on. Markups are drawn here.
- Right panels. Properties and the Tool Chest.
- Markups List. Every markup in the document as a row of data.
- Navigation bar. Page controls, zoom, view modes and quick tools.
- Status bar. Help text, snap and grid toggles, scale and page size.
You start with the Select tool, the File Access panel on the left (with your recent files) and the Properties and Tool Chest panels on the right. The Markups List waits closed at the bottom: press Alt+M to open it.
Menus
The menu bar is drawn inside the MarkupRight window on every platform, so the menus are the same on macOS, Windows and Linux. Shortcuts are listed beside each command. Items that are planned for a later version appear grayed out; hover over one to see why.
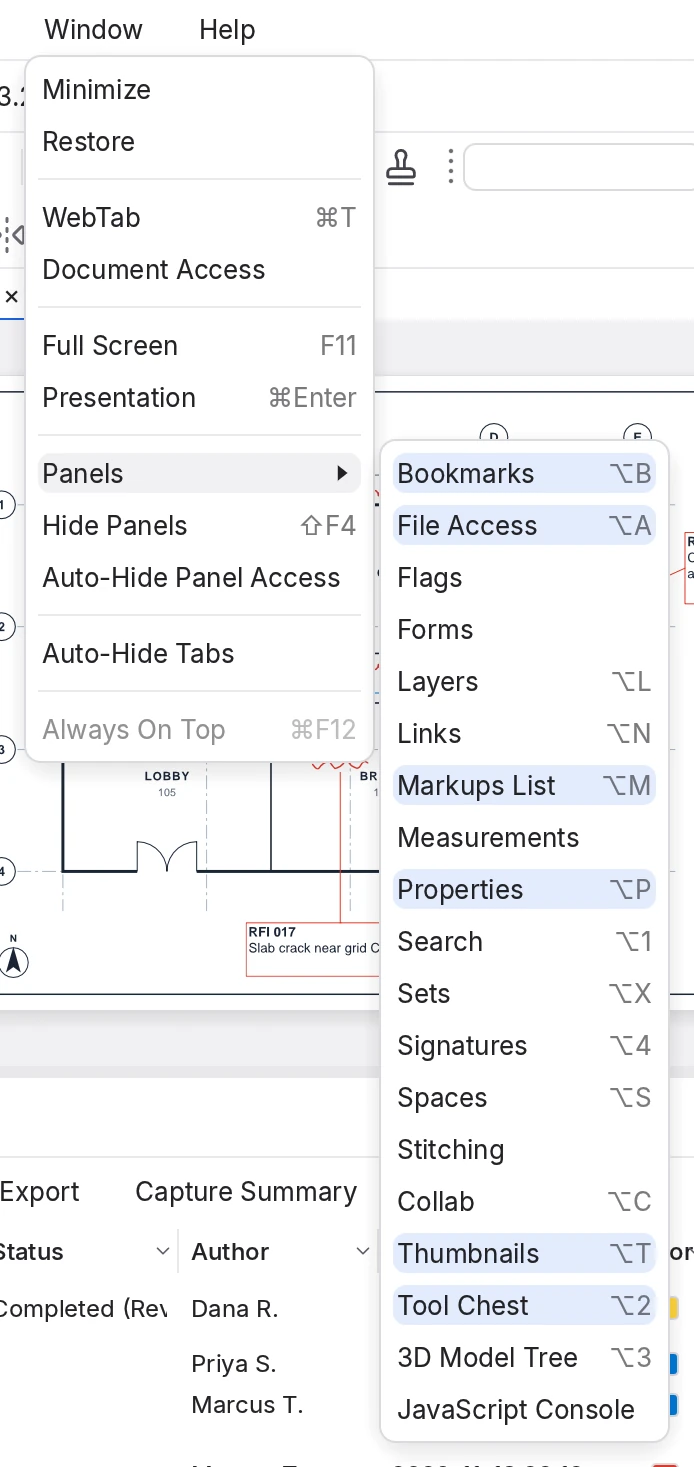
Where to look for what:
| Menu | What you'll find there |
|---|---|
| MarkupRight | About, Preferences, Profiles, Keyboard Shortcuts, Administrator and Exit. |
| File | New, Open, Create, Combine, Save, Publish, Export, Print and Sets. |
| Edit | Undo, clipboard, Select, Lasso, Snapshot, Format Painter, editing PDF content and Advanced Search. |
| View | Zoom, page layouts, splits, rulers, grid and snapping, Dark Mode and panel layout. |
| Document | Page tools, headers and footers, security, compare, OCR, file size and flattening. |
| Batch | The same document tools applied to many files at once. |
| Tools | Markup, stamp, measure and signature tools, and the toolbar list. |
| Window | WebTabs, full screen, presentation and every panel. |
| Help | Find Tools + Commands, Check for Updates and your licence. |
Find Tools + Commands
If you know what you want but not where it lives, press Ctrl+K and start typing. Matching commands appear as you type, with the menu they belong to and their shortcut. Use ↑ and ↓ to choose and Enter to run.
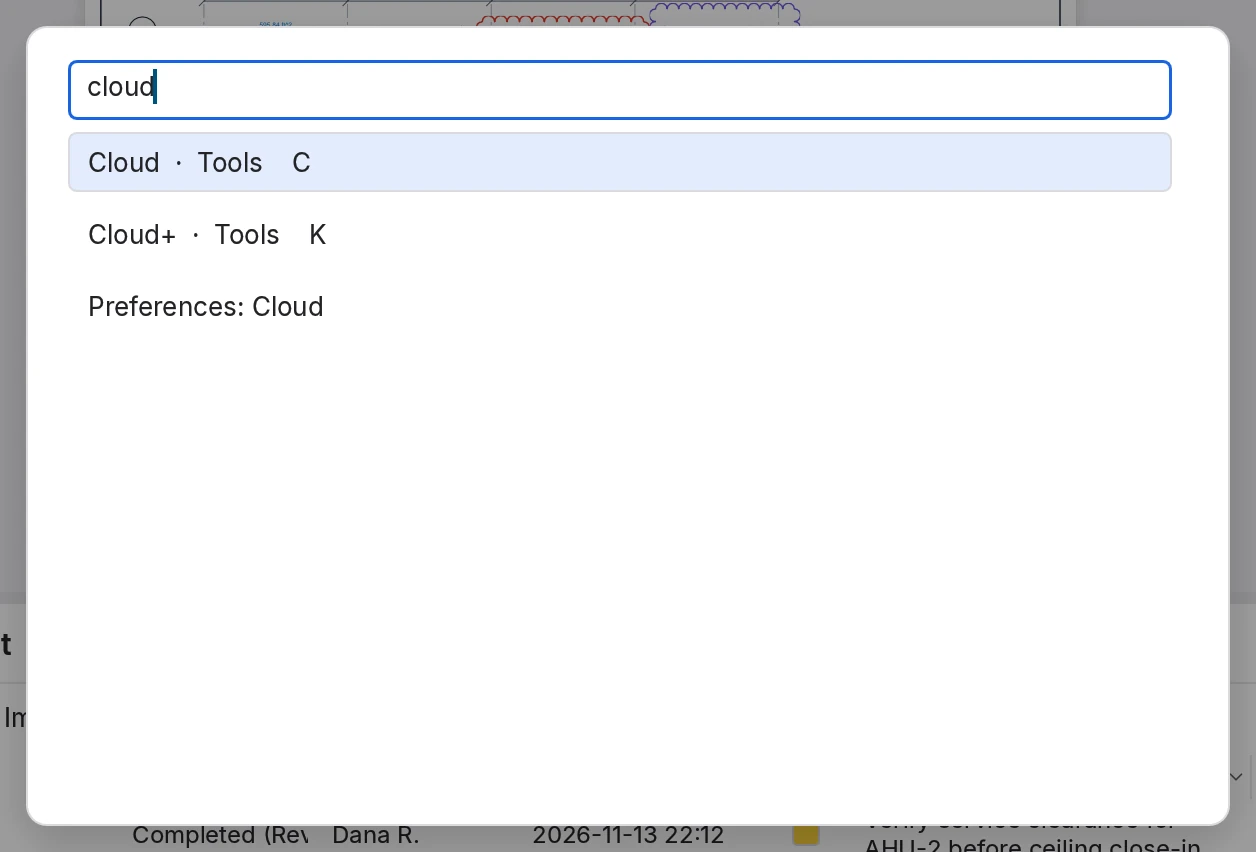
It finds more than menu items: it can switch Profiles, open a page of Preferences directly, and run commands that have no menu entry at all, such as Visual Search… and Back Up Settings. Grayed-out results can't run right now; hover over one to see why.
The Properties toolbar
The strip under the menus always shows the most useful details for what's in front of you:


In a WebTab it becomes an address bar with Back, Forward, Refresh and Favorites.
Toolbars
Toolbars put common commands one click away. Four are shown when you first start: File, Markup, Font and Alignment. On a narrow window they wrap onto a second row.

The Markup toolbar holds the everyday markup tools:

To show, move or hide a toolbar
- Choose Tools ▸ Toolbars and click a toolbar's name. Toolbars that are showing are highlighted; click one again to hide it.
- To move a toolbar, drag its grip (the dotted handle at its left end) to another row, to the top or bottom of the window, or anywhere else to let it float.
- To stop toolbars moving by accident, choose Tools ▸ Toolbars ▸ Lock.
MarkupRight has 22 toolbars, including Shapes, Text, Measure, Redaction and Sketch. You can also build your own: see Customise toolbars.
Document tabs
Each open file gets a tab. Hover over a tab to see the file's full location.
- Switch documents by clicking their tabs. If there are more tabs than fit, arrows appear at the ends of the strip, and the ▼ button lists every open document.
- Close a tab with its ×, a middle-click, or Ctrl+W. If it has unsaved changes you'll be asked whether to save.
- Split the view by dragging a tab to the edge of the document area. See Split views.
- Detach a tab into its own window by dragging it outside the main window, or right-click it and choose Detach. Close the detached window to bring its tabs back.
Panels
Panels sit in three docks: left, right and bottom. Each dock has a strip of panel icons along its edge (the access bar). Click an icon to bring that panel forward, and click it again to slide the dock closed.
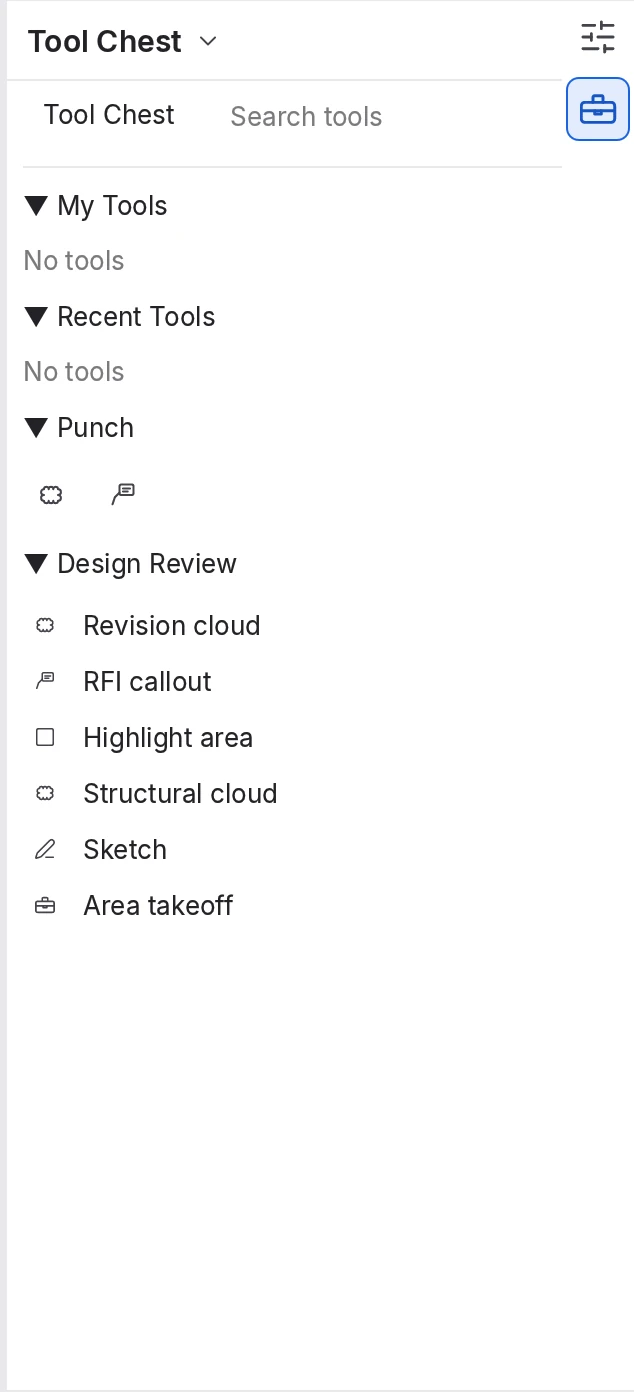
Every panel and its shortcut
A panel's shortcut shows it, or closes its dock if it's already showing.
| Panel | Shortcut | What it's for | |
|---|---|---|---|
| Thumbnails | Alt+T | See, reorder and manage pages. More | |
| Bookmarks | Alt+B | Jump to bookmarked pages and views. | |
| File Access | Alt+A | Recent, pinned and browsed files. More | |
| Search | Alt+1 | Find text in a page, document, folder or Set. More | |
| Layers | Alt+L | Show and hide PDF layers. | |
| Links | Alt+N | The document's places and hyperlinks. | |
| Markups List | Alt+M | Every markup as data. More | |
| Properties | Alt+P | The selected markup, or the document. More | |
| Tool Chest | Alt+2 | Your saved, reusable tools. More | |
| Measurements | — | Scale, measure tools and totals. More | |
| Signatures | Alt+4 | Signatures in the document and whether they're valid. More | |
| Spaces | Alt+S | Named areas such as rooms. More | |
| Sets | Alt+X | A drawing set's sheets and revisions. More | |
| Collab | Alt+C | Shared Projects and live Sessions. More | |
| Flags | — | Page markers you can jump back to. | |
| Stitching | — | Join sheets split at matchlines. More |
Shortcuts in this guide are shown for your platform. To see the other platform's keys, use the macOS / Windows · Linux switch at the top of the page.
To arrange panels
- Resize a dock by dragging its edge. Click the edge to open or close the dock.
- Move a panel by dragging its name (or its icon) over another panel group: a target wheel appears. Drop on the centre to add it as a tab, or on an edge to split the group. Drop it outside the docks to float it.
- Right-click a panel icon for Show, Hide and Attach ▸ Left / Right / Bottom / Detach.
- Hide every panel at once with Window ▸ Hide Panels Shift+F4; press it again to bring them back.
Your layout is saved automatically in your Profile. If you ever lose track of a panel, choose View ▸ Reset Panel Layout.
The navigation bar
Under the document is the navigation bar F4. Its left half moves around the document; its right half shows page information and view settings.

| Control | What it does | |
|---|---|---|
| Unsplit, Split Vertical, Split Horizontal | Show one view, or two side by side or stacked. | |
| One Full Page / Scrolling Pages | Page by page, or one continuous scroll. | |
| Pan, Select, Select Text, Zoom | The four basic tools: Esc, V, Shift+T and Z. | |
| First, Previous, page field, Next, Last | Move between pages. Type a page number or label in the field and press Enter. | |
| Previous View, Next View | Go back and forward through places you've looked at, like a web browser. | |
| Zoom box | Pick a zoom level from 8% to 6400%, or Actual Size, Fit Page or Fit Width. |

| Control | What it does | |
|---|---|---|
| Page size and scale | The current page's size and drawing scale. Click the scale to set it. | |
| Security | Shows whether the file is protected; its menu changes permissions. | |
| Document Properties | Title, author, attachments and security, in the Properties panel. | |
| Dark Mode | Shows pages as light lines on dark, which is easier on the eyes at night. | |
| Dimmer | Fades the drawing so your markups stand out. | |
| Profile | Switch, save or manage your workspace Profiles. |
The status bar
The bottom edge F8 shows what the control under the pointer does, plus notices about your licence and updates. On the right are toggles you'll use while drawing:

When the pointer is over a page, the status bar also shows its position, measured from the page's top-left corner.
Tools and the Esc key
Most of the time you're using one of two tools: Pan (the hand, for moving around) or Select (the arrow, for picking markups). Markup and measure tools hand you back to Select after each markup, unless Reuse is on.
Esc is your way out. Each press does the next of these: cancels the shape you're drawing, stops the current tool, clears the selection, and finally switches to Pan.
Keys such as V (Select), C (Cloud) and R (Rectangle) work when the page has focus. While you're typing in a text box or a panel field, they type letters instead. Click the page first if a shortcut doesn't respond.
Light and dark
MarkupRight follows your system's light or dark appearance. To choose one yourself, go to MarkupRight ▸ Preferences ▸ General ▸ Options ▸ Theme and pick System, Light or Dark.
For power users Expert
- Work from the keyboard. Ctrl+K runs anything by name. Every tool has a single-letter key (see Keyboard shortcuts), and the first nine tools in My Tools run with 1–9.
- Make the layout yours. Build custom toolbars with Tools ▸ Toolbars ▸ Customize…, rebind any key in MarkupRight ▸ Keyboard Shortcuts, and keep separate layouts for different jobs as Profiles. See Preferences and profiles.
- Use every screen. Detach tabs onto a second monitor; each detached window remembers its place. Split a window up to 16 ways and synchronise the views (Split views).
- Reclaim space. Window ▸ Auto-Hide Panel Access hides the icon strips of closed docks until you move the pointer to the edge, and Window ▸ Auto-Hide Tabs hides tab strips until you need them. Window ▸ Full Screen F11 gives the drawing the whole screen.
- Run several copies. Each time you start MarkupRight you get an independent window, so you can keep two projects apart. Markups copied in one paste into another.