Security and signatures
Control who can open, print and change a PDF, remove sensitive content for good, and sign or certify drawings with a digital ID, so anyone can check who signed and whether the file has changed since.
- You'll learn
- How to password-protect and redact a PDF, create a digital ID, sign and certify, and read a signature's state.
- Where
- Document ▸ Security… Ctrl+L, Edit ▸ PDF Content and Tools ▸ Signature.
- Signatures panel
- Alt+4: who signed, and whether the file changed after they did.
Passwords and permissions
A PDF can carry two passwords:
- An open password is needed to open the file at all.
- A master password limits printing and editing for everyone who doesn't know it. Typing it lifts every limit.
Choose Document ▸ Security… Ctrl+L to see the file's security; the same summary is under Security in Document Properties Ctrl+D. The padlock in the navigation bar shows the state at a glance, and its menu has Change Permissions… and your saved presets.
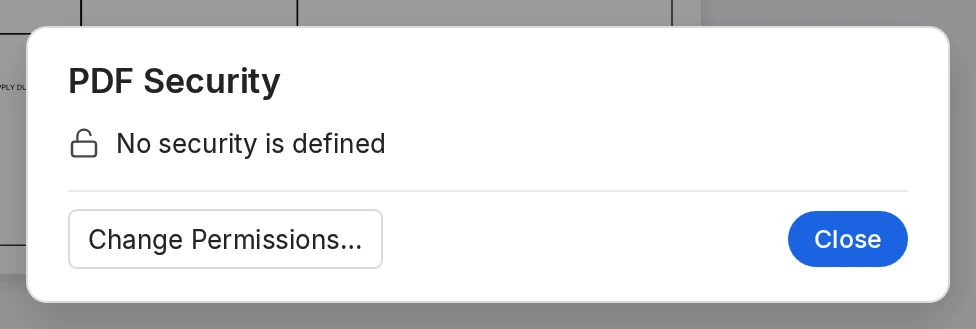
The Security dialog, also opened with Document ▸ Protect Using Password…, has these settings:
| Setting | What it does |
|---|---|
| Preset | <Custom>, or a preset you saved with Save. Presets keep everything except the passwords. |
| Require Password to Open the Document | Turns on Open Password and Confirm Open Password. |
| Enable Permissions to Limit Printing and Editing | Turns on Master Password and Confirm Master Password, and the limits below. |
| Printing | None, Low Resolution, or High Resolution (the default). |
| Fill Forms, Edit Markups, Edit Document, Page Manipulation, Copy Content, Accessibility | All allowed at first. Untick what to deny. |
| Encryption | RC4 40-bit, RC4 128-bit, AES 128-bit, or AES 256-bit (the default and the strongest). Encrypt Metadata, on at first, encrypts the document's properties too. |
OK waits until both confirmations match and the open and master passwords differ. With neither box ticked, OK removes the security. The three possible setups behave like this:
| Setup | Opening the file | Printing and editing |
|---|---|---|
| Open password only | Asks for the password. | In MarkupRight, nobody can edit or print it, and anyone who opens it can change its security. Other PDF viewers may give full rights. |
| Master password only | Opens with no prompt. | The limits apply until someone enters the master password. |
| Both | Either password opens it. | The open password gets the limits; the master password lifts them. |
The padlock in the navigation bar shows which applies:
| Padlock | Means | |
|---|---|---|
| Open | No security is defined. | |
| Closed, blue | A password is required to open the document. | |
| With a keyhole | Printing and editing are limited. | |
| Closed, red | Both: a password to open, and limits. |
To password-protect a PDF
- Choose Document ▸ Protect Using Password…
- Tick Require Password to Open the Document and type the password in both boxes.
- To limit printing and editing too, tick Enable Permissions to Limit Printing and Editing, type a different master password twice, choose a Printing level and untick what to deny.
- Choose OK.
A notice says the security takes effect when you save.
- Save the document, or use Save As to keep an unprotected copy.
The padlock shows the new state.
Opening a protected file asks for its password. Commands its security refuses are grayed, with the reason in their tooltips. Changing a limited file's security asks for the master password first; after three wrong tries the security stays as it was.
Remove security
Choose Document ▸ Remove Security. If the file has limits, type the master password when asked. The security goes when you save.
Keep the passwords safe: without them, MarkupRight can't open the file or lift its limits. Splitting a secured file, or extracting its pages, gives files with no security at all. Signed and certified files refuse security changes.
Redaction
Redaction removes content from a PDF for good: the text, images and graphics under each mark are deleted from the file, and a box is painted in their place. A black rectangle drawn over text is not redaction, because the text is still in the file underneath. Redaction works in two stages: you mark what to remove, and the marks stay editable markups until you apply them.
To mark content, use any of these:
- Edit ▸ PDF Content ▸ Mark for Redaction, then drag a box.
- Edit ▸ PDF Content ▸ Mark Text for Redaction, then drag across the words.
- Select text, right-click it and choose Redact.
- In the Search panel Alt+1, search, tick the results and choose Actions ▸ Mark for Redaction. See Search.
The Redaction toolbar (Tools ▸ Toolbars ▸ Redaction) has the same commands plus Redaction Properties. Select a mark to set its properties in the Properties panel Alt+P:
| Property | What it does |
|---|---|
| Color | The mark's outline before you apply it (red). |
| Redact Color | The fill painted in its place afterwards (black). |
| Use Overlay Text | Prints text in the box, REDACTED at first. Then Custom Text, Autosize Text, Repeat Text, Font Size and Text Color set it. |
| Redaction Code | Choose… a legal code from the U.S. FOIA or U.S. Privacy Act lists, such as (b)(6). |
Edit ▸ PDF Content ▸ Apply Redactions asks which Pages to apply (All Pages, Current or Custom). Its Redaction Options, all off at first, also strip information from the whole document: Document Information and Metadata, Hidden Text, Hidden Layers, File Attachments, Bookmarks, Links, Actions and JavaScripts, Comments and Markups, Form Fields, and Private Data of Other Applications.
To redact text
- Choose Edit ▸ PDF Content ▸ Mark Text for Redaction and drag across the words, or mark search results.
Each mark shows a red outline.
- Choose Edit ▸ PDF Content ▸ Apply Redactions.
- Choose the pages and any Redaction Options, then choose OK.
A notice reads "Applied N redactions on M pages. Save the document to make them permanent." The text is gone, with boxes in its place.
- Choose File ▸ Save As… and save under a new name.
Until you save, Undo puts everything back. Saving rewrites the whole file, so earlier versions kept inside it go too, and the content can't be recovered from it. Use Save As so you still have the original. Redacted pages also can't have their flattened markups unflattened.
As a safeguard, if any text would still be readable under a mark, MarkupRight redacts nothing and names the pages. Redaction is refused on signed and certified files.
Digital IDs
A digital ID is what proves a signature is yours: a certificate with a private key, protected by a password. You can create one in MarkupRight, use one your organization issued (a .p12 or .pfx file), or, on Windows and macOS, use an ID already in the system's certificate store. Choose Tools ▸ Signature ▸ Digital IDs… to open Manage Digital IDs, which lists each ID's Name, Issuer, Expires date and Source.
To create a digital ID
- Choose Tools ▸ Signature ▸ Digital IDs…, then Add Digital ID…
- Choose Create Digital ID file.
- Fill in Name: and E-mail Address:, and if you like Organization:, Organizational Unit: and Country:.
- Type a Password: of at least 8 characters, twice, and choose OK.
The ID joins the list as Self-signed, valid for five years.
- Use an existing ID file: choose Browse for existing Digital ID file and pick the
.pfxor.p12. - System IDs: Windows and macOS list the IDs already in the Windows Certificate Store or the macOS Keychain. Change their passwords or delete them in the operating system; MarkupRight can't create IDs there. On Linux, MarkupRight uses ID files.
- Share your certificate: select your ID and choose Export…. It saves the public certificate (
.cer) for others to add to their Trusted Identities. Your private key stays with you. - Staying logged in: MarkupRight remembers an ID's password for the Password Timeout in Preferences ▸ Tools ▸ Signature, 5 minutes at first (0 asks every time). Log Out forgets it at once.
An ID's password can't be recovered or reset, and the ID can't sign without it. An expired ID signs only if you tick "Sign with the expired ID anyway", and its signatures then validate as unknown.
Sign and certify
Signing seals the document as it is: anyone can check who signed it and whether it changed afterwards. Certifying is the author's signature: it also fixes which changes are allowed later, and it's possible only before anyone else signs.
To sign with a digital ID
- Choose Tools ▸ Signature ▸ Sign Document and drag a box where the signature should appear. Or, with the Select tool, click an empty signature field.
The Sign dialog opens.
- Choose your Digital ID:, type its Password: and choose Log In.
- Type a Reason:, such as Reviewed, and choose OK.
- In the save dialog that follows, save under a new name.
A notice reads "Signed and saved as…", and the signature appears in its box.
Signing always saves the document. If you cancel the save, nothing is signed. Edits you haven't saved are signed along with the rest. The Sign dialog's settings:
| Setting | What it does |
|---|---|
| Digital ID: | The ID to sign with. New… creates one; View shows its certificate, with its SHA-256 fingerprint. |
| Document Certification | Certify as well, and choose the Permitted changes after certifying: No changes allowed; Fill in forms and digital signatures (the default); or Markups, fill in forms, and digital signatures. Grayed once the document has a signature. |
| Reason:, Location:, Contact Info: | Stored in the signature and shown in the Signatures panel. |
| Appearance: | How the visible signature looks. Edit… changes it. |
| Timestamp server: | An http:// address of a timestamp service. Without one, the signature carries your computer's time. Timestamp required refuses to sign if the server doesn't answer; otherwise MarkupRight signs without the timestamp. |
| Embed revocation information (LTV) | Stores the certificates' revocation status, so the signature can still be checked long after signing. Needs the network. |
The Signature Appearance editor (Edit…, or Manage Appearances… in Manage Digital IDs) puts a Graphic on the left (None, your Name, or a PNG or JPEG File such as a scanned signature or seal) and the text items you tick on the right: Name, Date, Reason, Location, Distinguished Name and Labels.
To certify, choose Tools ▸ Signature ▸ Certify and Sign and drag a box, or Tools ▸ Signature ▸ Certify Document for a certification with no visible box. Both are grayed once the document has a signature.
Signature fields
A signature field is an empty box waiting for a signer. Prepare them when a drawing needs several signatures:
- Choose Tools ▸ Form ▸ Digital Signature.
- Drag one box for each signer, then press Esc.
- Each signer clicks their field with the Select tool to sign it.
Right-click a field and choose Signature Field Properties… to set its Name:, Tooltip:, whether the Field: shows and prints (Visible, Hidden, Visible but doesn't print, Hidden but printable), its Orientation:, Required and Lock, or to Delete Field. A Read-Only field can never be signed.
Once a document is signed, adding a field would change what was signed, so Add Signature Field is grayed. Later signers can still sign the empty fields.
The Signatures panel
When you open a signed file, MarkupRight offers to show its signatures:
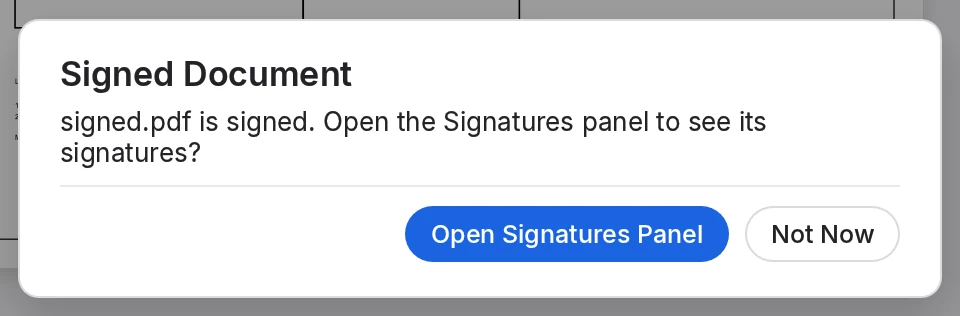
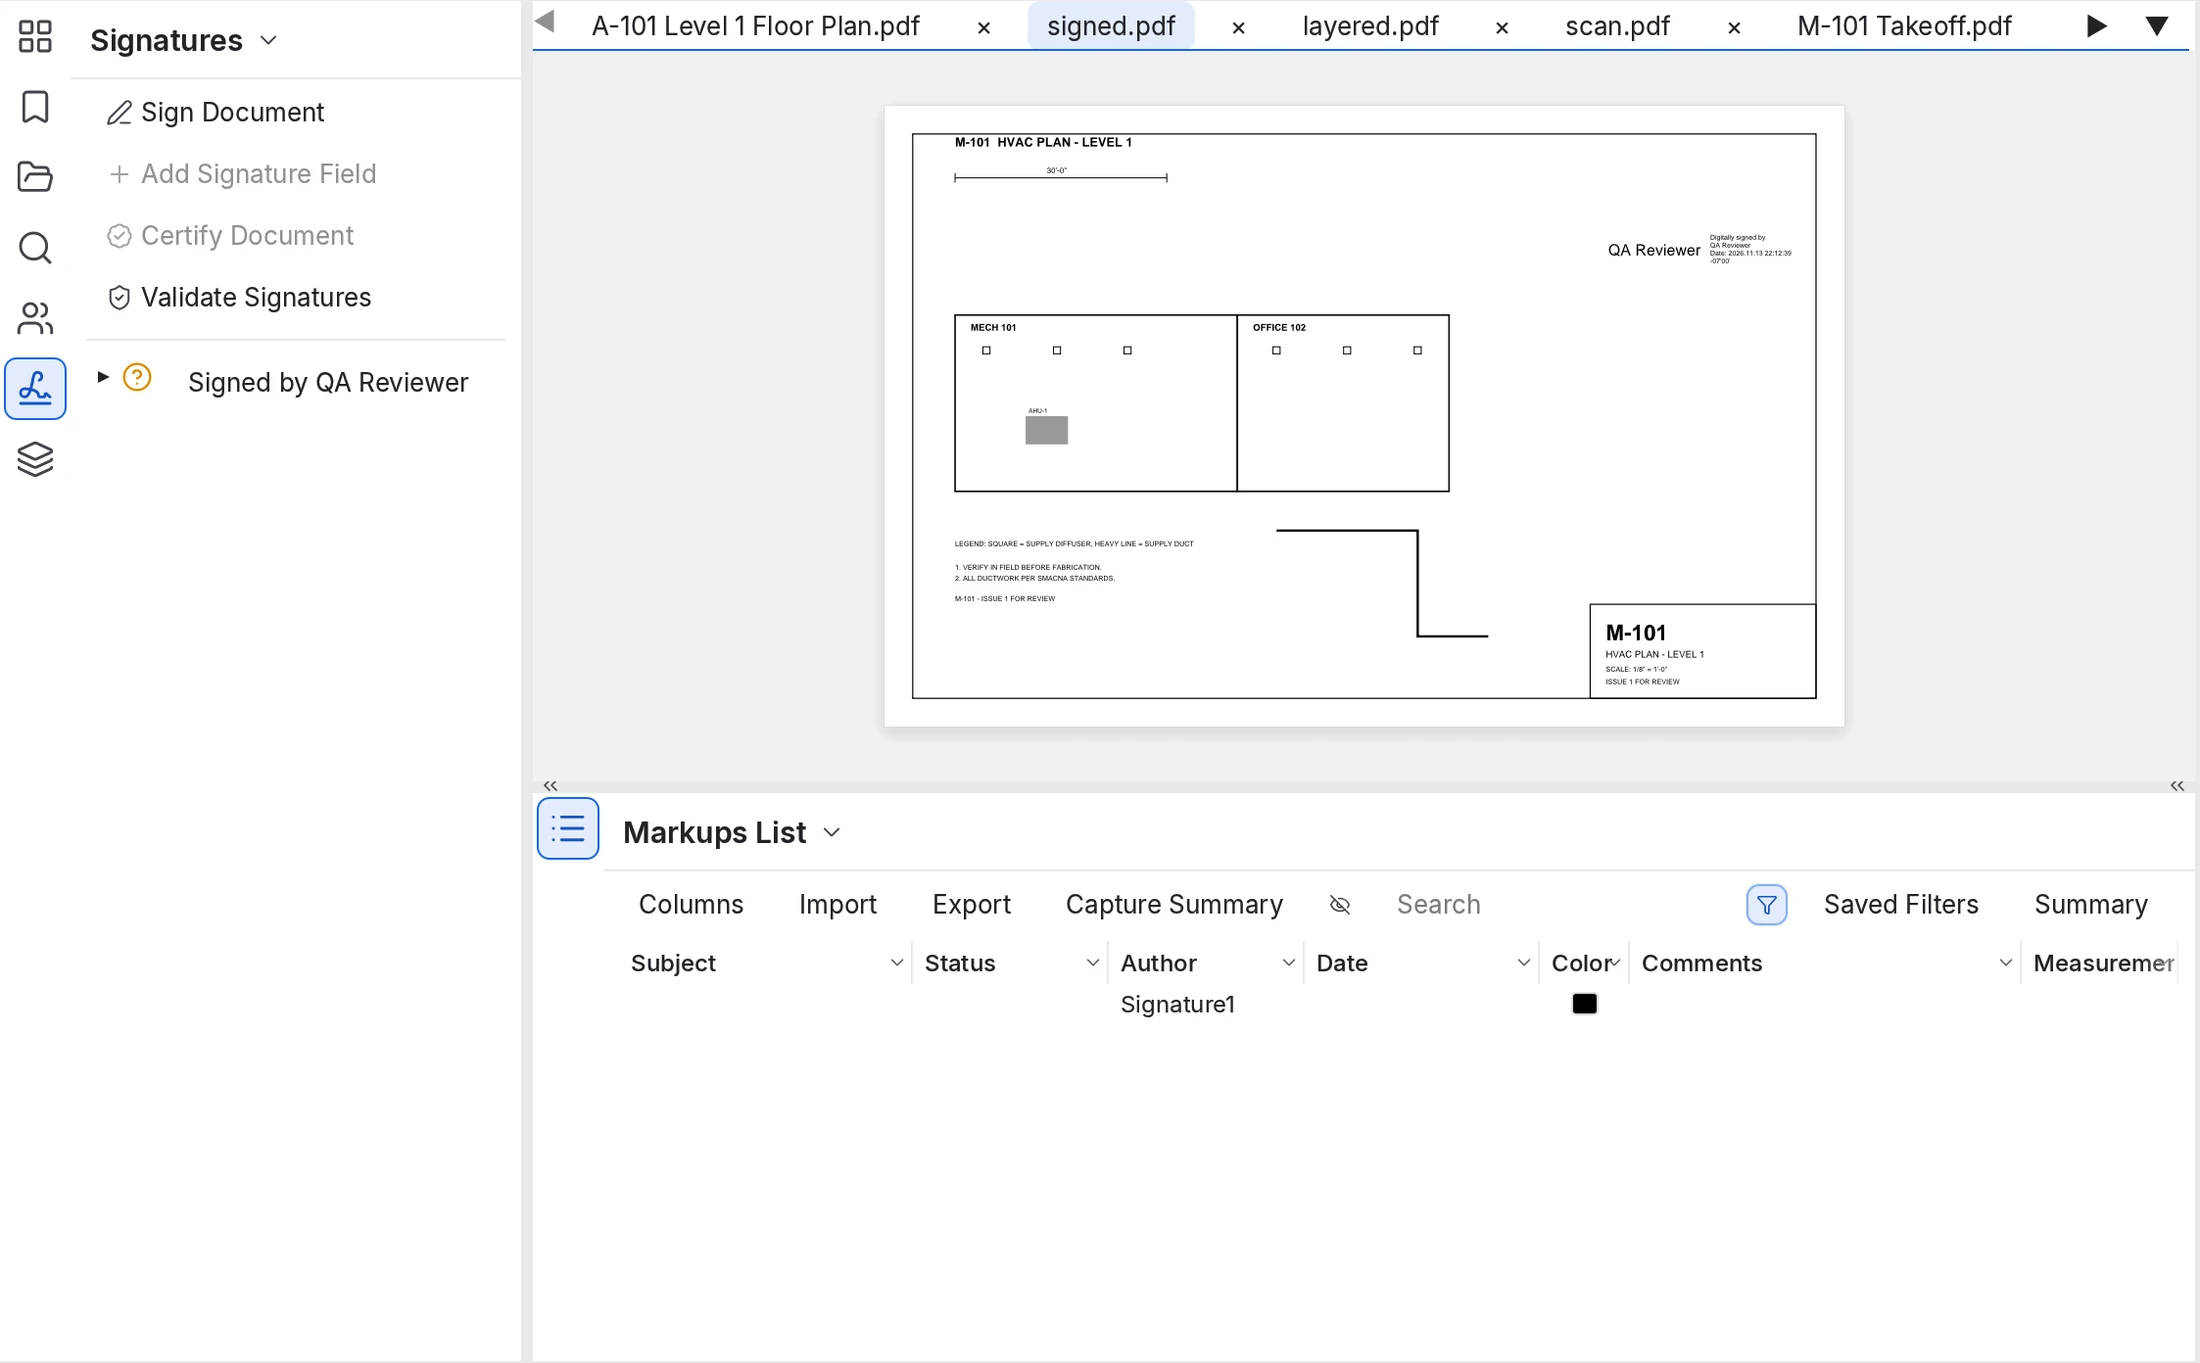 1
2
3
- Panel buttons. Sign Document, Add Signature Field, Certify Document and Validate Signatures. Two are grayed because the file is already signed.
- A signature. Its state icon and signer. Click the arrow for the details.
- The visible signature. What the signer's appearance put on the page.
The panel lists certifications first, then signatures, then empty fields as "field (empty)". Expand a row to see the signer, issuer, date, reason, location, timestamp and whether LTV information is embedded, plus Changes since signing:. Right-click a row to Validate Signature, or to Clear Signature or Clear Certificate (your own only). Validate Signatures checks them all again. Each signature shows one of seven states:
| Icon | State | What to do | |
|---|---|---|---|
| Blue badge | The document is certified, and the certification is valid. | Nothing. | |
| Green shield | The signer's identity is trusted, and the document hasn't changed since it was signed. | Nothing. | |
| Green shield with a pencil | The signature is valid, but the document has been updated since it was signed. | Expand the row to read the changes, such as markups or later signatures. | |
| Amber question mark | The signer's identity is unknown. | Add the signer's certificate to Trusted Identities. | |
| Amber question mark with a pencil | The signer's identity is unknown, and the document has been updated since it was signed. | Trust the signer, then read the changes. | |
| Gray question mark | The signature hasn't been validated yet (rare). | Choose Validate Signatures. | |
| Red cross | The signature or certification is invalid: the document has been altered since it was signed. | Don't rely on it. Ask the signer for a fresh copy. |
Trusted Identities
An amber question mark means the signature is intact but nothing vouches for the signer yet. To trust a colleague, ask them to export their certificate (Export… in Manage Digital IDs) and send you the file.
To trust a colleague's signatures
- Choose Tools ▸ Signature ▸ Trusted Identities…
- Choose Add Trusted Identity… and open their certificate (
.cer,.crt,.pem,.deror.p7b).They join the list, and the signatures in your open files are checked again.
- Choose Close.
Their signatures show a green shield, or a green shield with a pencil if the file has changed since.
Remove takes an identity off the list. Below the list, a line says whether a widely used commercial root certificate is installed; signatures from IDs issued under that root validate only once it is, and your certificate authority can provide it.
What signed and certified files allow
Signatures protect what was signed, so some changes are refused afterwards. Refused commands are grayed, and their tooltips explain why.
| File | Markups | Fill in forms | Sign | Pages, content, security | Extract and Split |
|---|---|---|---|---|---|
| Signed | Yes | Yes | Yes | No | Yes, but the new files carry no signatures |
| Certified: Markups, fill in forms, and digital signatures | Yes | Yes | Yes | No | No |
| Certified: Fill in forms and digital signatures | No | Yes | Yes | No | No |
| Certified: No changes allowed | No | No | No | No | No |
The Preferences setting Tools ▸ Signature ▸ Restrict changes that invalidate digital signatures is on at first. Turn it off and markups are allowed on any certified document too; MarkupRight warns you when you do.
For power users Expert
- Lift limits for one session. Enter permissions password… in Find Tools + Commands Ctrl+K takes a file's master password and lifts its limits until you close it, without changing the file.
- The first signature secures the file. Signing a file that has no security also applies AES-256 with no open password and a master password nobody knows, so the padlock then shows "Printing and editing are limited". That's what keeps others from changing the signed content; markups, form filling and more signatures stay allowed, as far as any certification permits.
- Presets live in
security_presets.jsonin the settings folder and travel with your Profiles. They never store passwords: choosing one from the padlock menu opens the Security dialog for you to type them. - Batch and command line. Batch ▸ Security… and Batch ▸ Sign & Seal… work on many files (see Batch processing). From a terminal, passwords come only from environment variables; in Windows terminals, use
markupright-cli.markupright batch security --bcx issue.bcx --preset "Issued for Bid" --master-password-env MR_PW markupright batch remove-security --bcx issue.bcx markupright batch sign-seal --bcx issue.bcx --id qa-reviewer.p12 --password-env MR_ID --rect 36,36,236,96 --reason Reviewedsign-sealalso takes--field(sign named fields instead of a box),--certify no-changes|form-fill|commentsand--timestamp <url>;--rectis in points from the page's top left. - Automation tools (with Preferences ▸ Admin ▸ MCP ▸ Enable the MCP connector on):
doc_protect,doc_unprotect,security_state,security_apply_preset,redact_mark,redact_apply,redact_clear,id_create,id_import,id_export_cer,sign_document,sign_states,sign_trustand more; see Command line and AI agents.doc_audit_redactionsfinds fake redactions in files you receive: filled boxes painted over text that is still there, and marks never applied. - Clear redaction marks, in Find Tools + Commands, removes every mark without applying any.
- Preference keys.
signature.password_timeout_min,signature.id_folder(Digital ID Location),signature.trusted_folder(Trusted Identity Location),signature.tsa_url(the default Timestamp Server),signature.ltvandsignature.restrict_invalidating_changes. - Where things are kept. ID files (with their
ids.jsonindex) inDigital IDs, and trusted certificates inTrusted Identities, both in the data folder:~/Library/Application Support/MarkupRighton macOS,%LOCALAPPDATA%\MarkupRighton Windows,~/.local/share/MarkupRighton Linux. MarkupRight never stores an ID's password. - Viewer mode. Without a licence or trial, signing and redaction are off; checking signatures still works.