Your first review
In about 15 minutes you'll review a floor plan from start to finish: open it, set its scale, cloud a change, raise an RFI, measure a room, stamp it, check the Markups List and save. Each step teaches one habit you'll use every day.
- You'll need
- MarkupRight installed (how) and any PDF drawing.
- You'll learn
- Navigating, scale, clouds, callouts, measuring, stamps, statuses and saving.
- The pictures
- Show sheet A-101 of the Harbor St. Clinic sample project.
1. Open the drawing
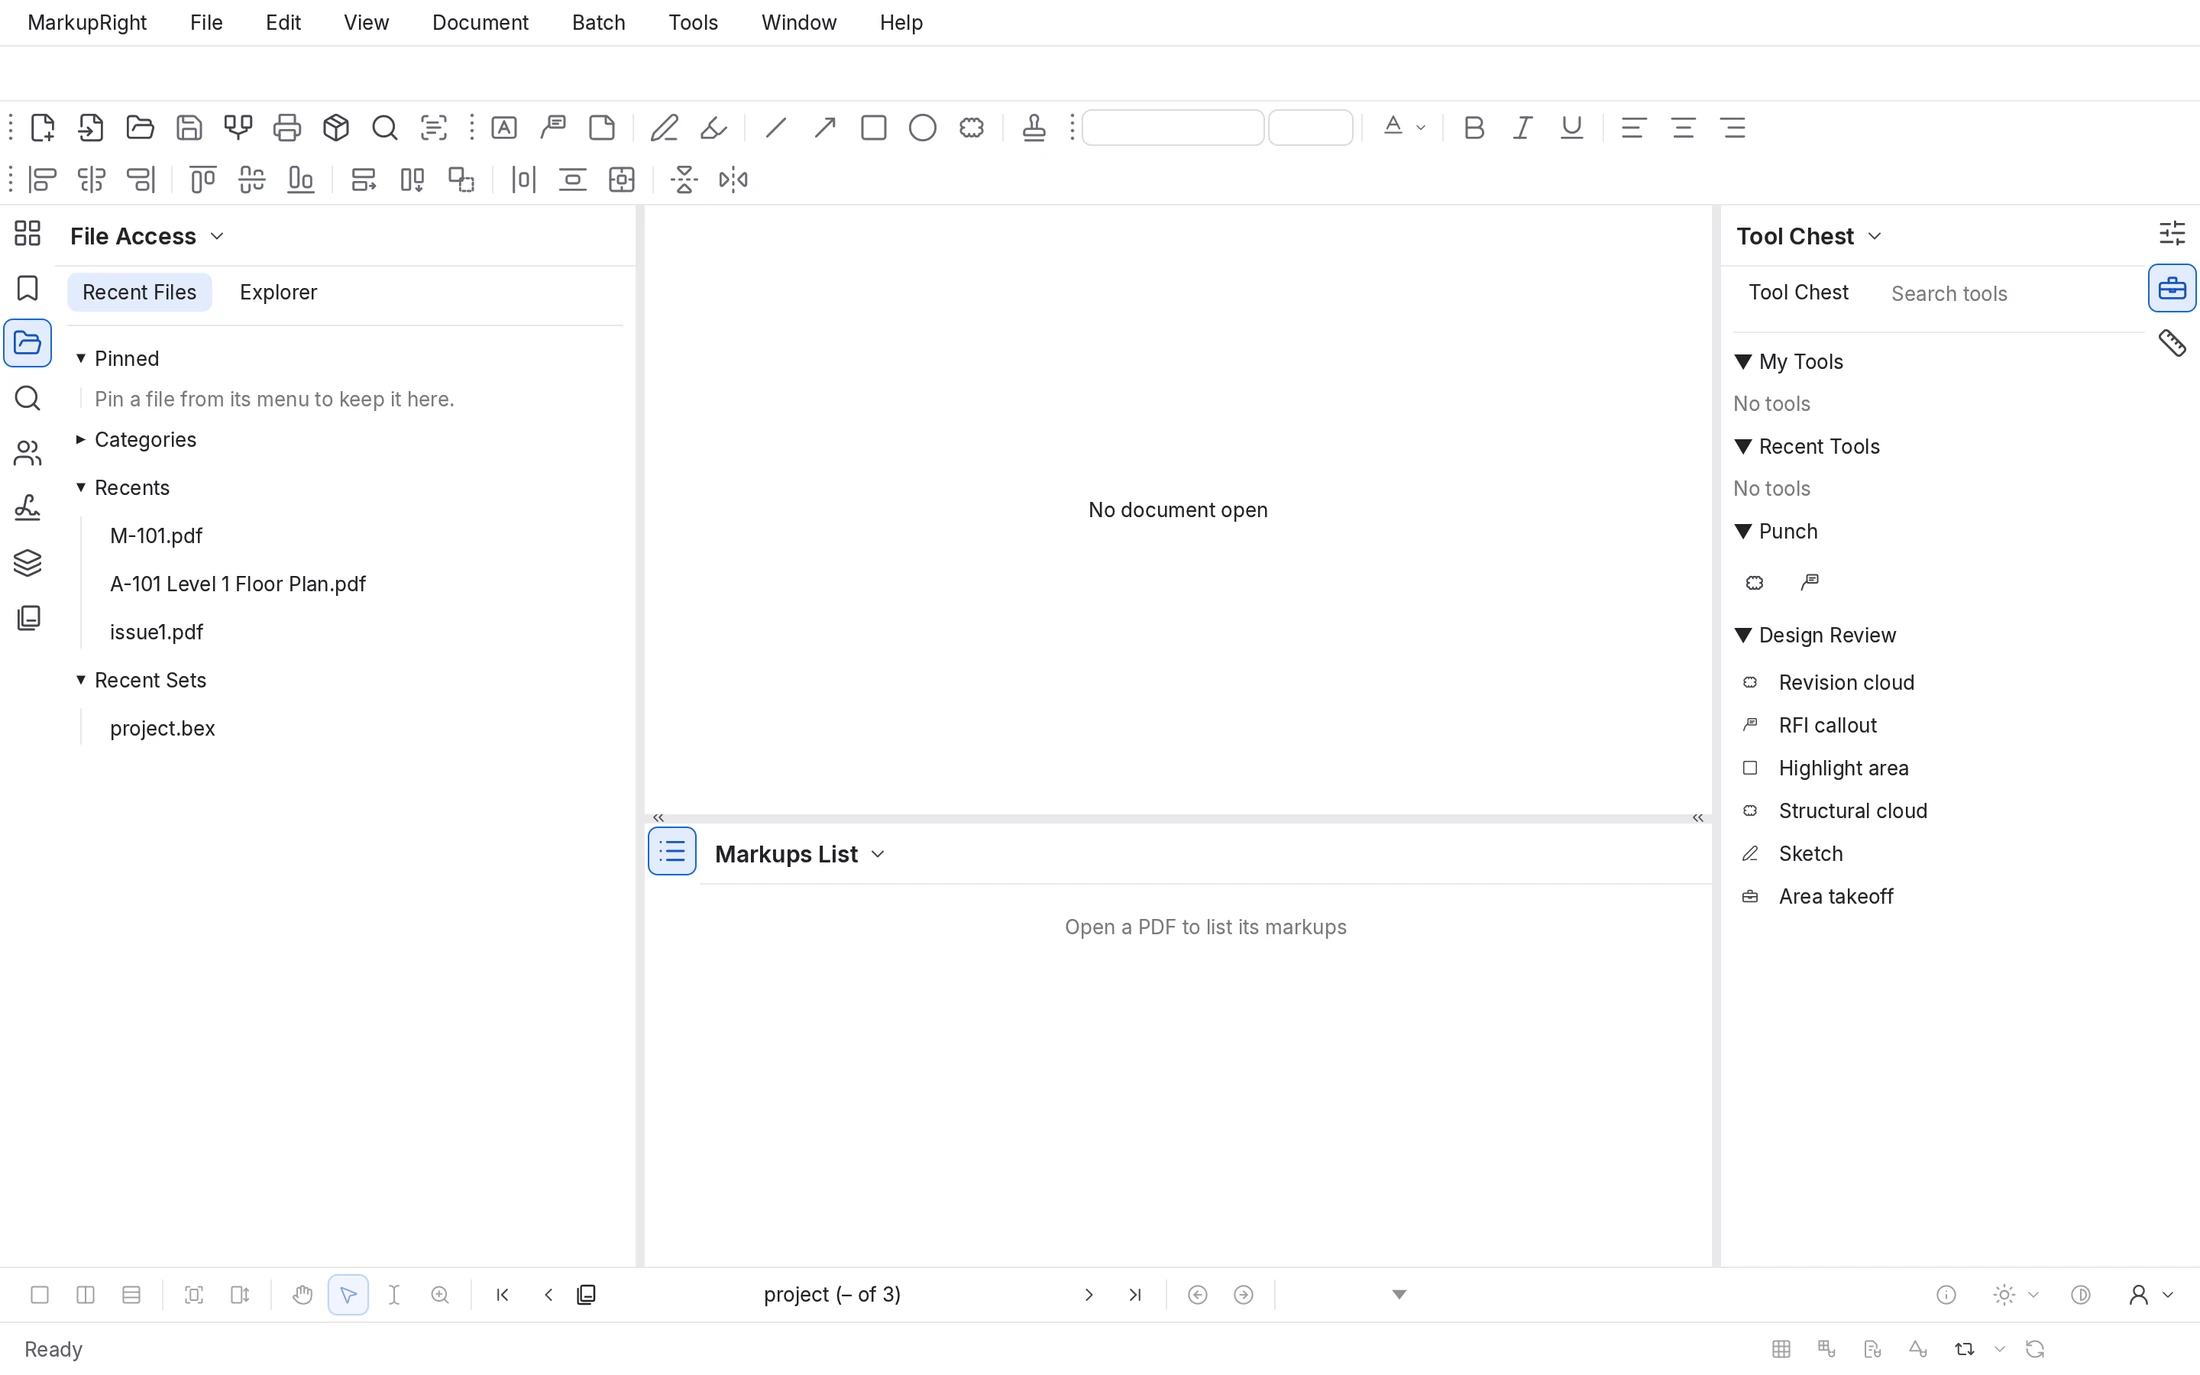
Start MarkupRight. With nothing open yet, the File Access panel on the left lists recent files.
 1
2
- File Access: click a recent file to open it.
- Open on the File toolbar, the same as File ▸ Open.
- Choose File ▸ Open Ctrl+O, pick your drawing and click Open. You can also drag the PDF onto the window.
The drawing opens in a tab, and the Thumbnails panel shows its pages.
- Press Ctrl+9 (Fit Page) to see the whole sheet.
- Zoom into a corner: hold Ctrl and turn the mouse wheel (or pinch on a trackpad). Press Ctrl+9 again to get back.
Press Esc to get the Pan tool (the hand) and drag the drawing. The wheel scrolls; Ctrl + wheel zooms around the pointer.
2. Put your name on your markups
Every markup records its author. Set your name once so your team knows who wrote what.
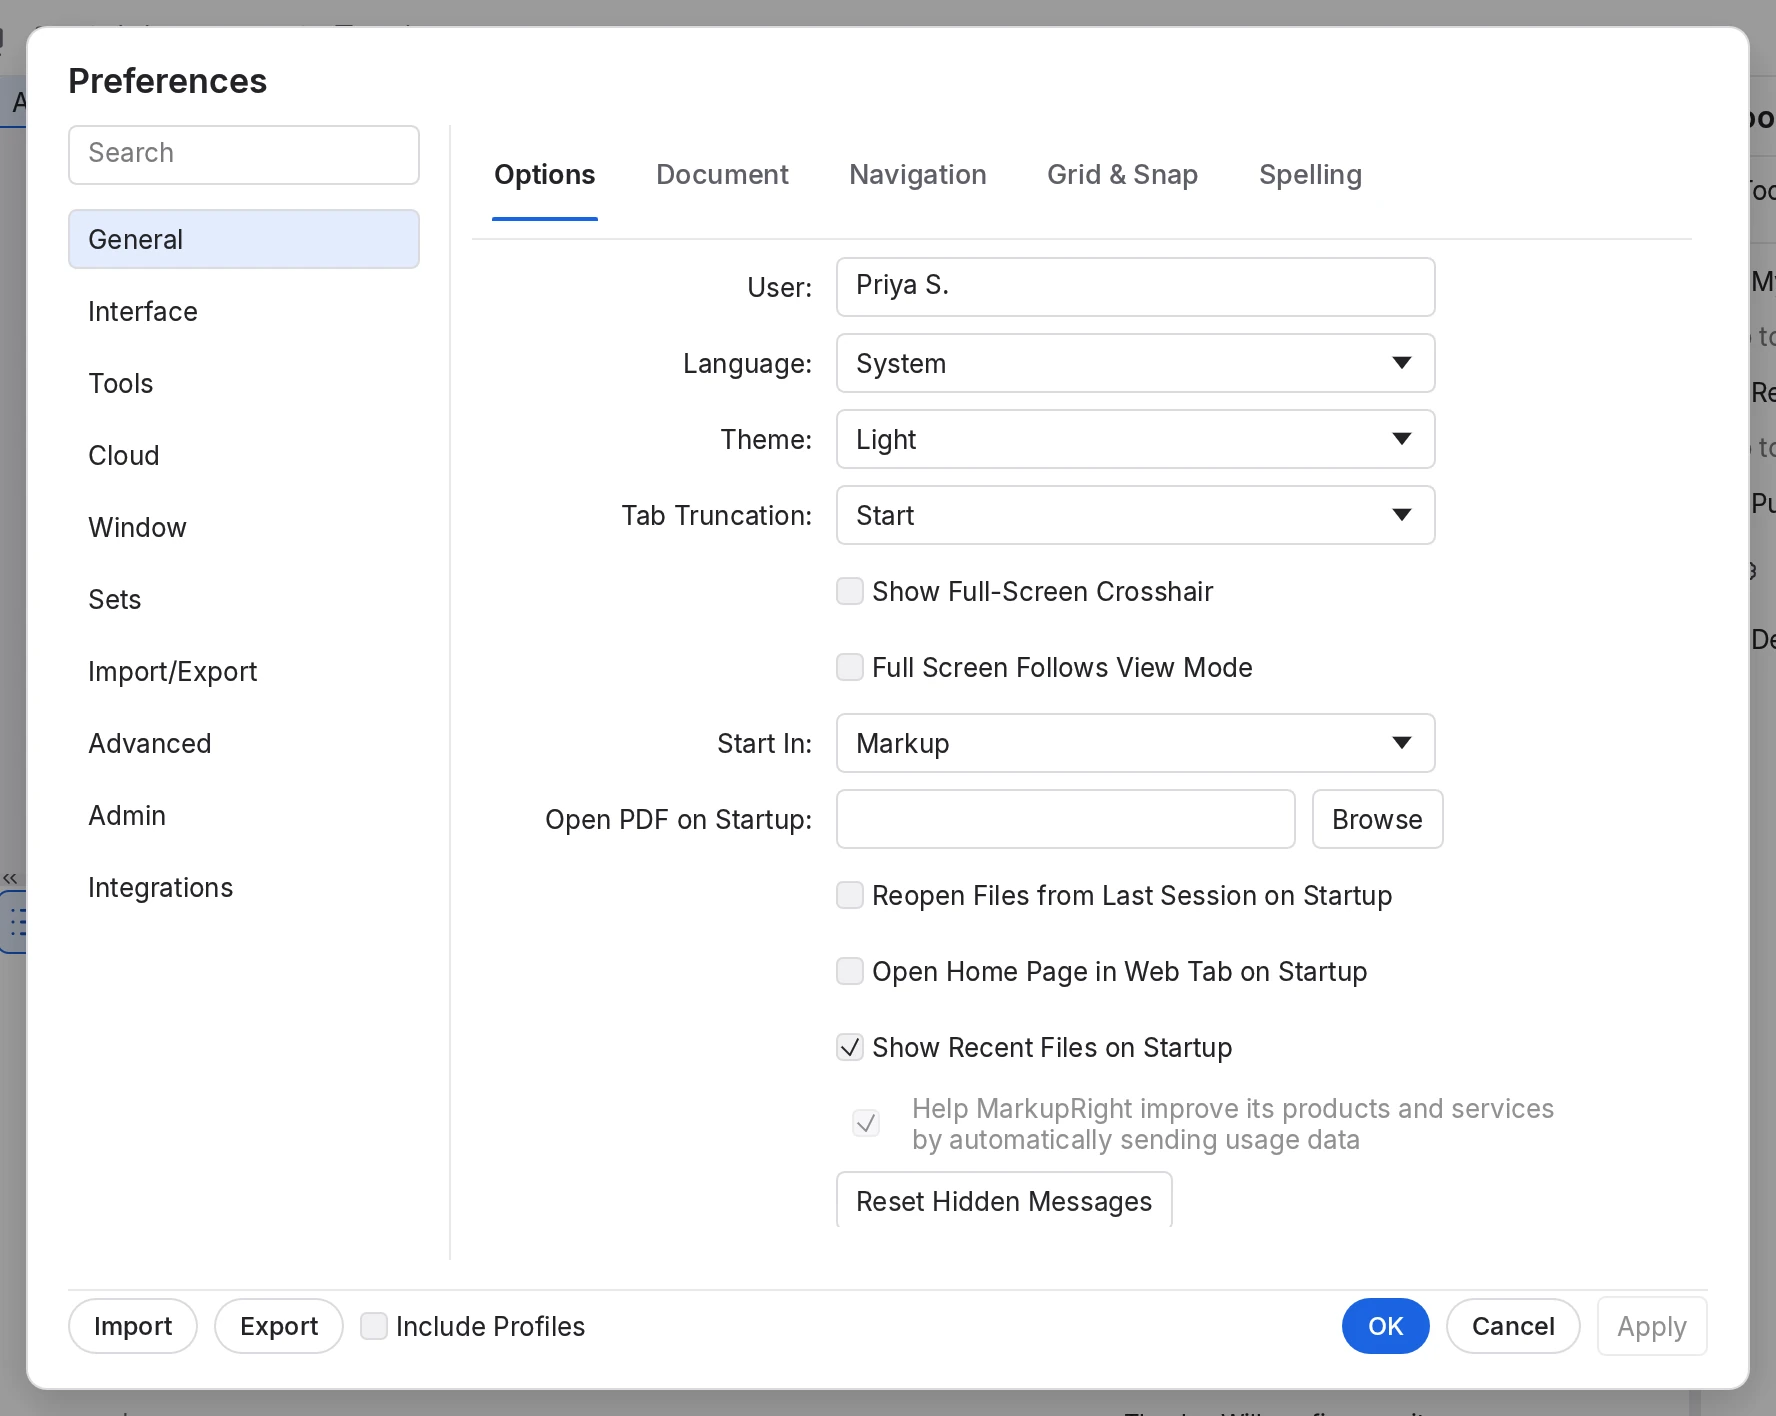
- Choose MarkupRight ▸ Preferences Ctrl+,.
- On General ▸ Options, type your name in User, then click OK.
3. Set the scale
A scale tells MarkupRight what a length on paper stands for, so measurements come out in feet or metres. Most sheets print their scale in the title block, for example 1/8" = 1'-0".
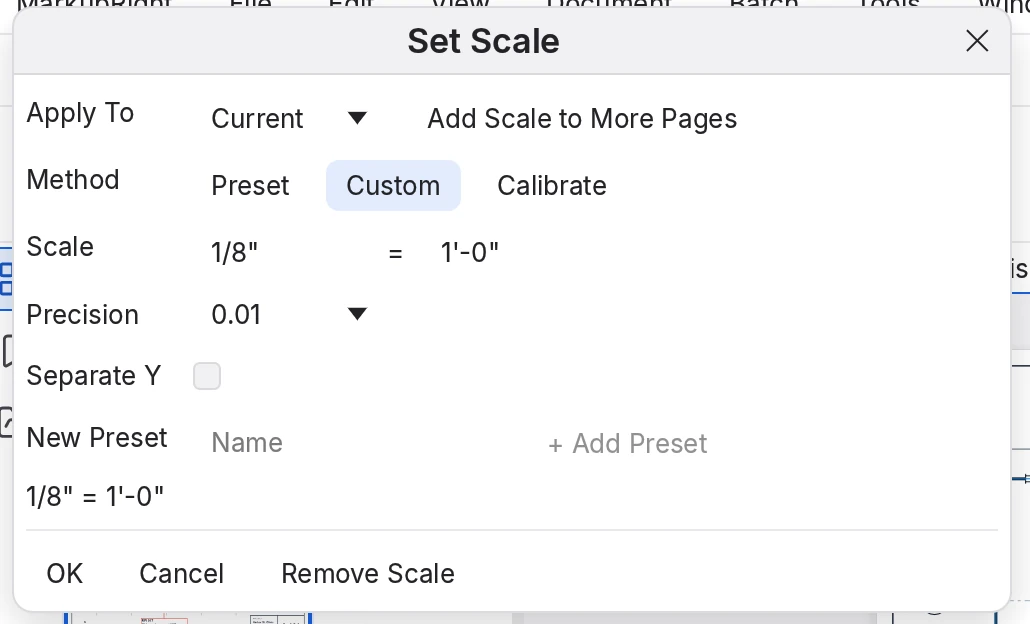
- Choose Tools ▸ Measure ▸ Set Scale….
- Leave Apply To on Current (or choose All if every page shares the scale).
- With Preset selected, choose the sheet's scale from the list, for example 1/8" = 1'-0". If it isn't there, choose Custom and type both sides, such as
1/8"=1'-0". - Click OK.
The scale appears in the navigation bar and the status bar.
4. Cloud a change
A revision cloud is the standard way to say "look here".
- Press C (or click Cloud on the Markup toolbar).
- Click each corner of the area you want to cloud.
- Click the first corner again, or press Enter, to close the cloud.
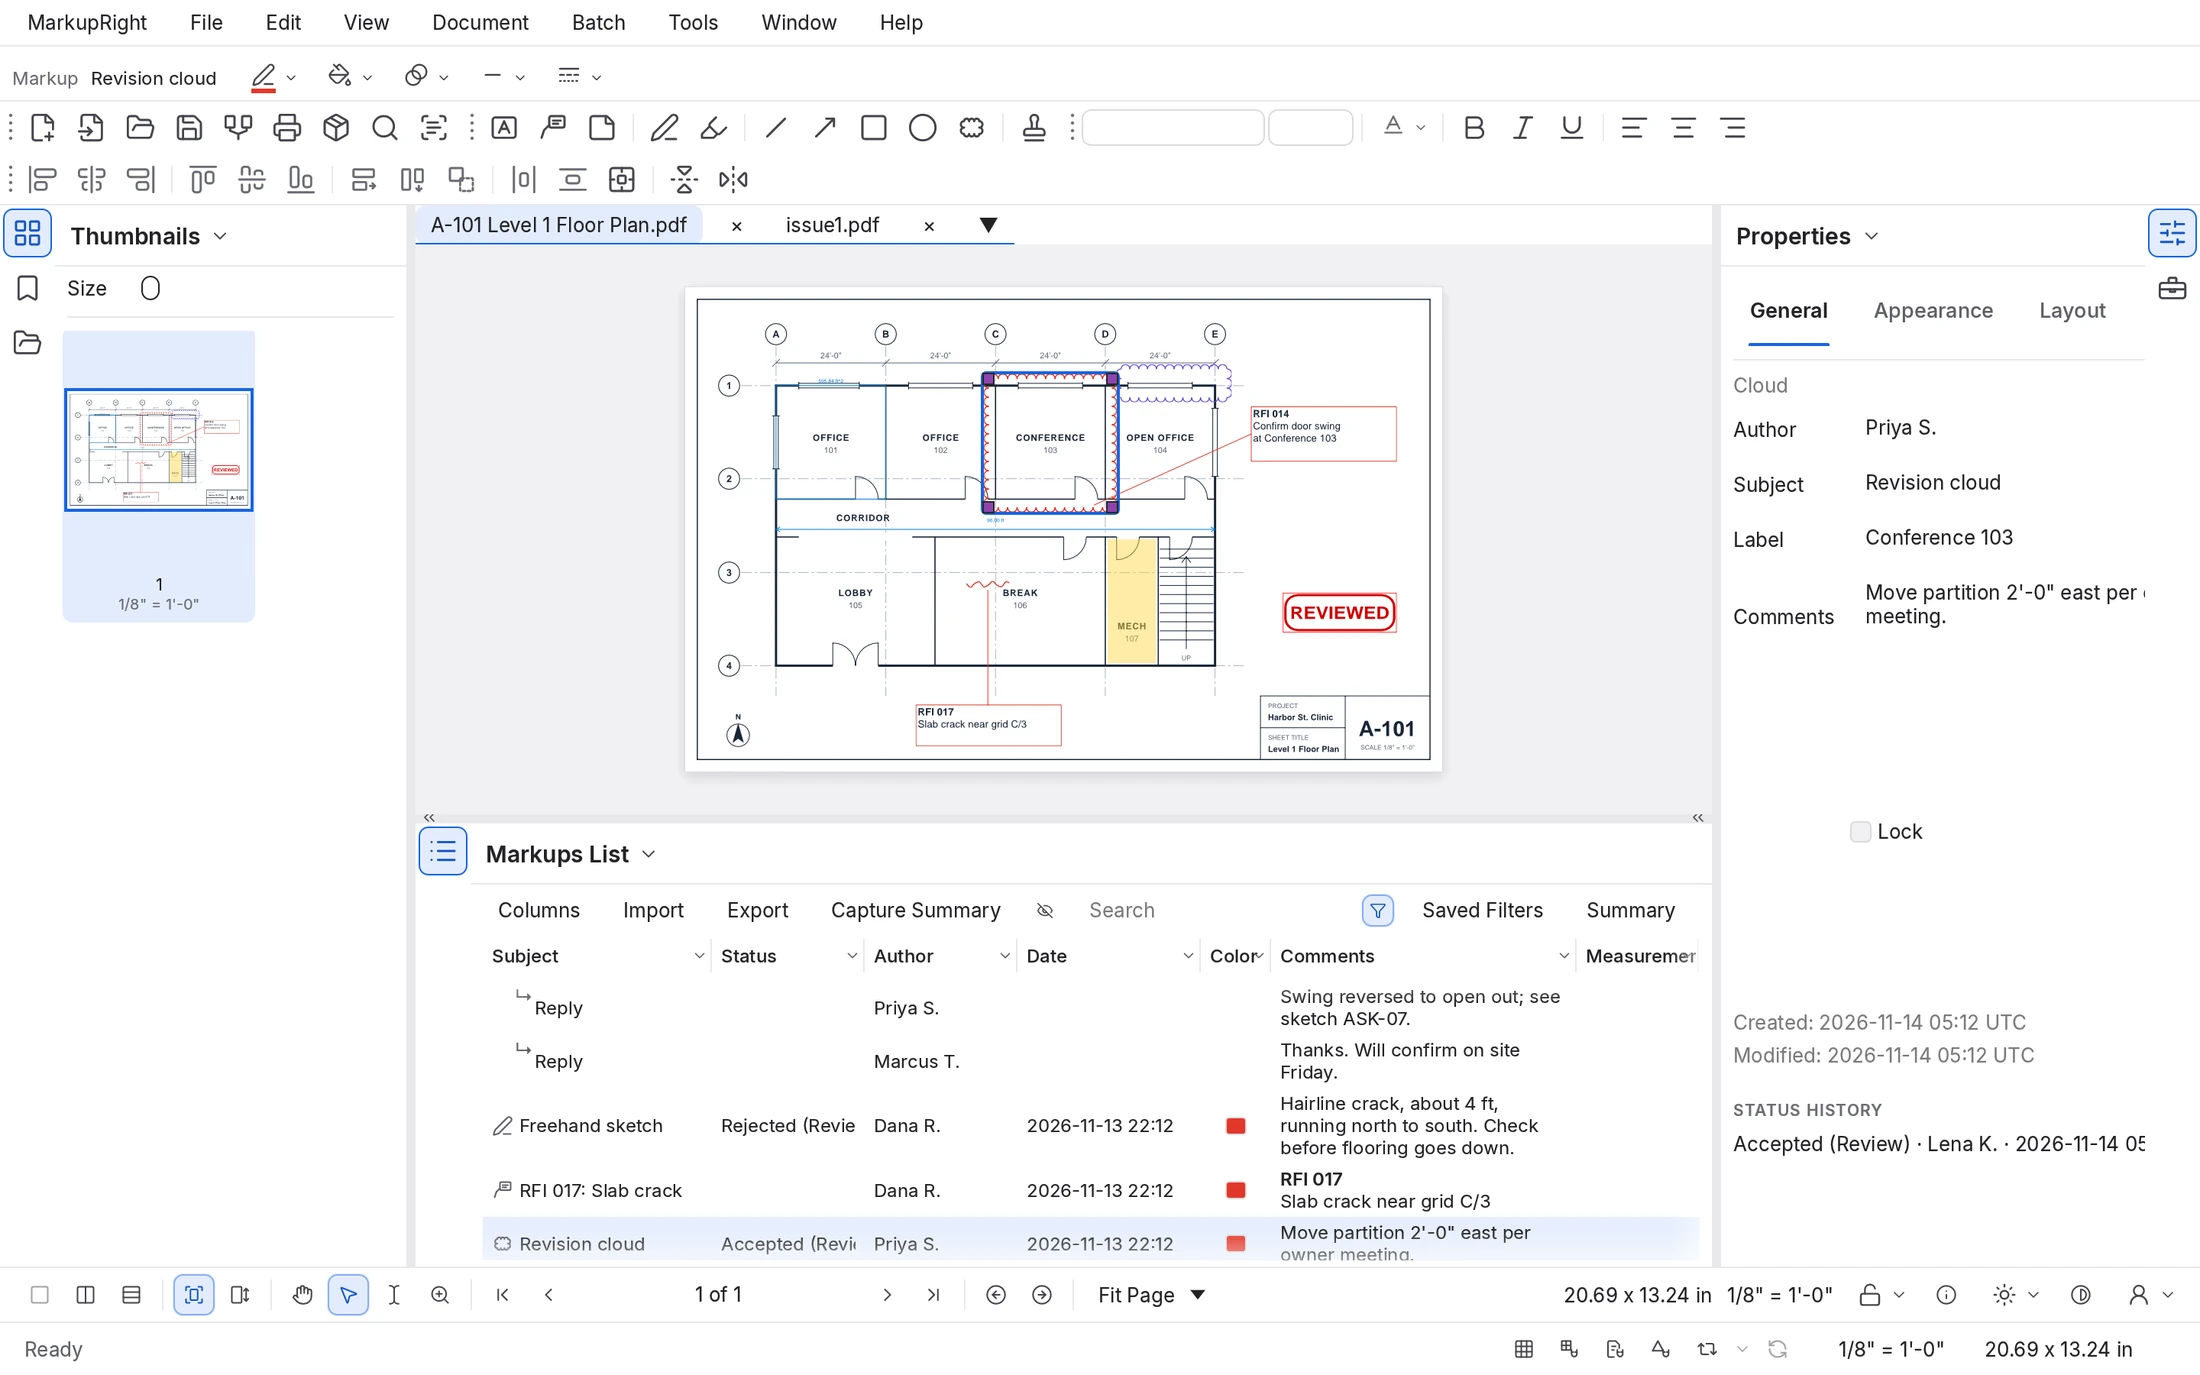
The cloud is drawn and selected, and the Select tool is back.
- Say why: press Alt+P to show the Properties panel and type in Comments, for example "Move partition 2'-0" east per owner meeting".
 1
2
3
- The selected cloud, with handles for reshaping it.
- The Properties toolbar now shows the cloud's colour, fill and line, ready to change.
- The Properties panel: Subject, Label and Comments become columns in the Markups List.
5. Raise an RFI with a callout
- Press Q for the Callout tool.
- Click the spot the leader should point at, such as a door swing.
- Click where you want the text box.
- Type your question, for example RFI 014: Confirm door swing at Conference 103, then press Esc.
To make it red and bold like the picture, select it and use the colour and font controls in the Properties toolbar. When you've styled a callout you like, right-click it and choose Set as Default, or keep it as a reusable tool in the Tool Chest.
6. Measure a room
- Press Alt+Shift+A for the Area tool.
- Click each corner of the room. Turn on Snap to Content (Ctrl+Shift+F8) to land exactly on the wall lines.
- Click the first corner again to finish.
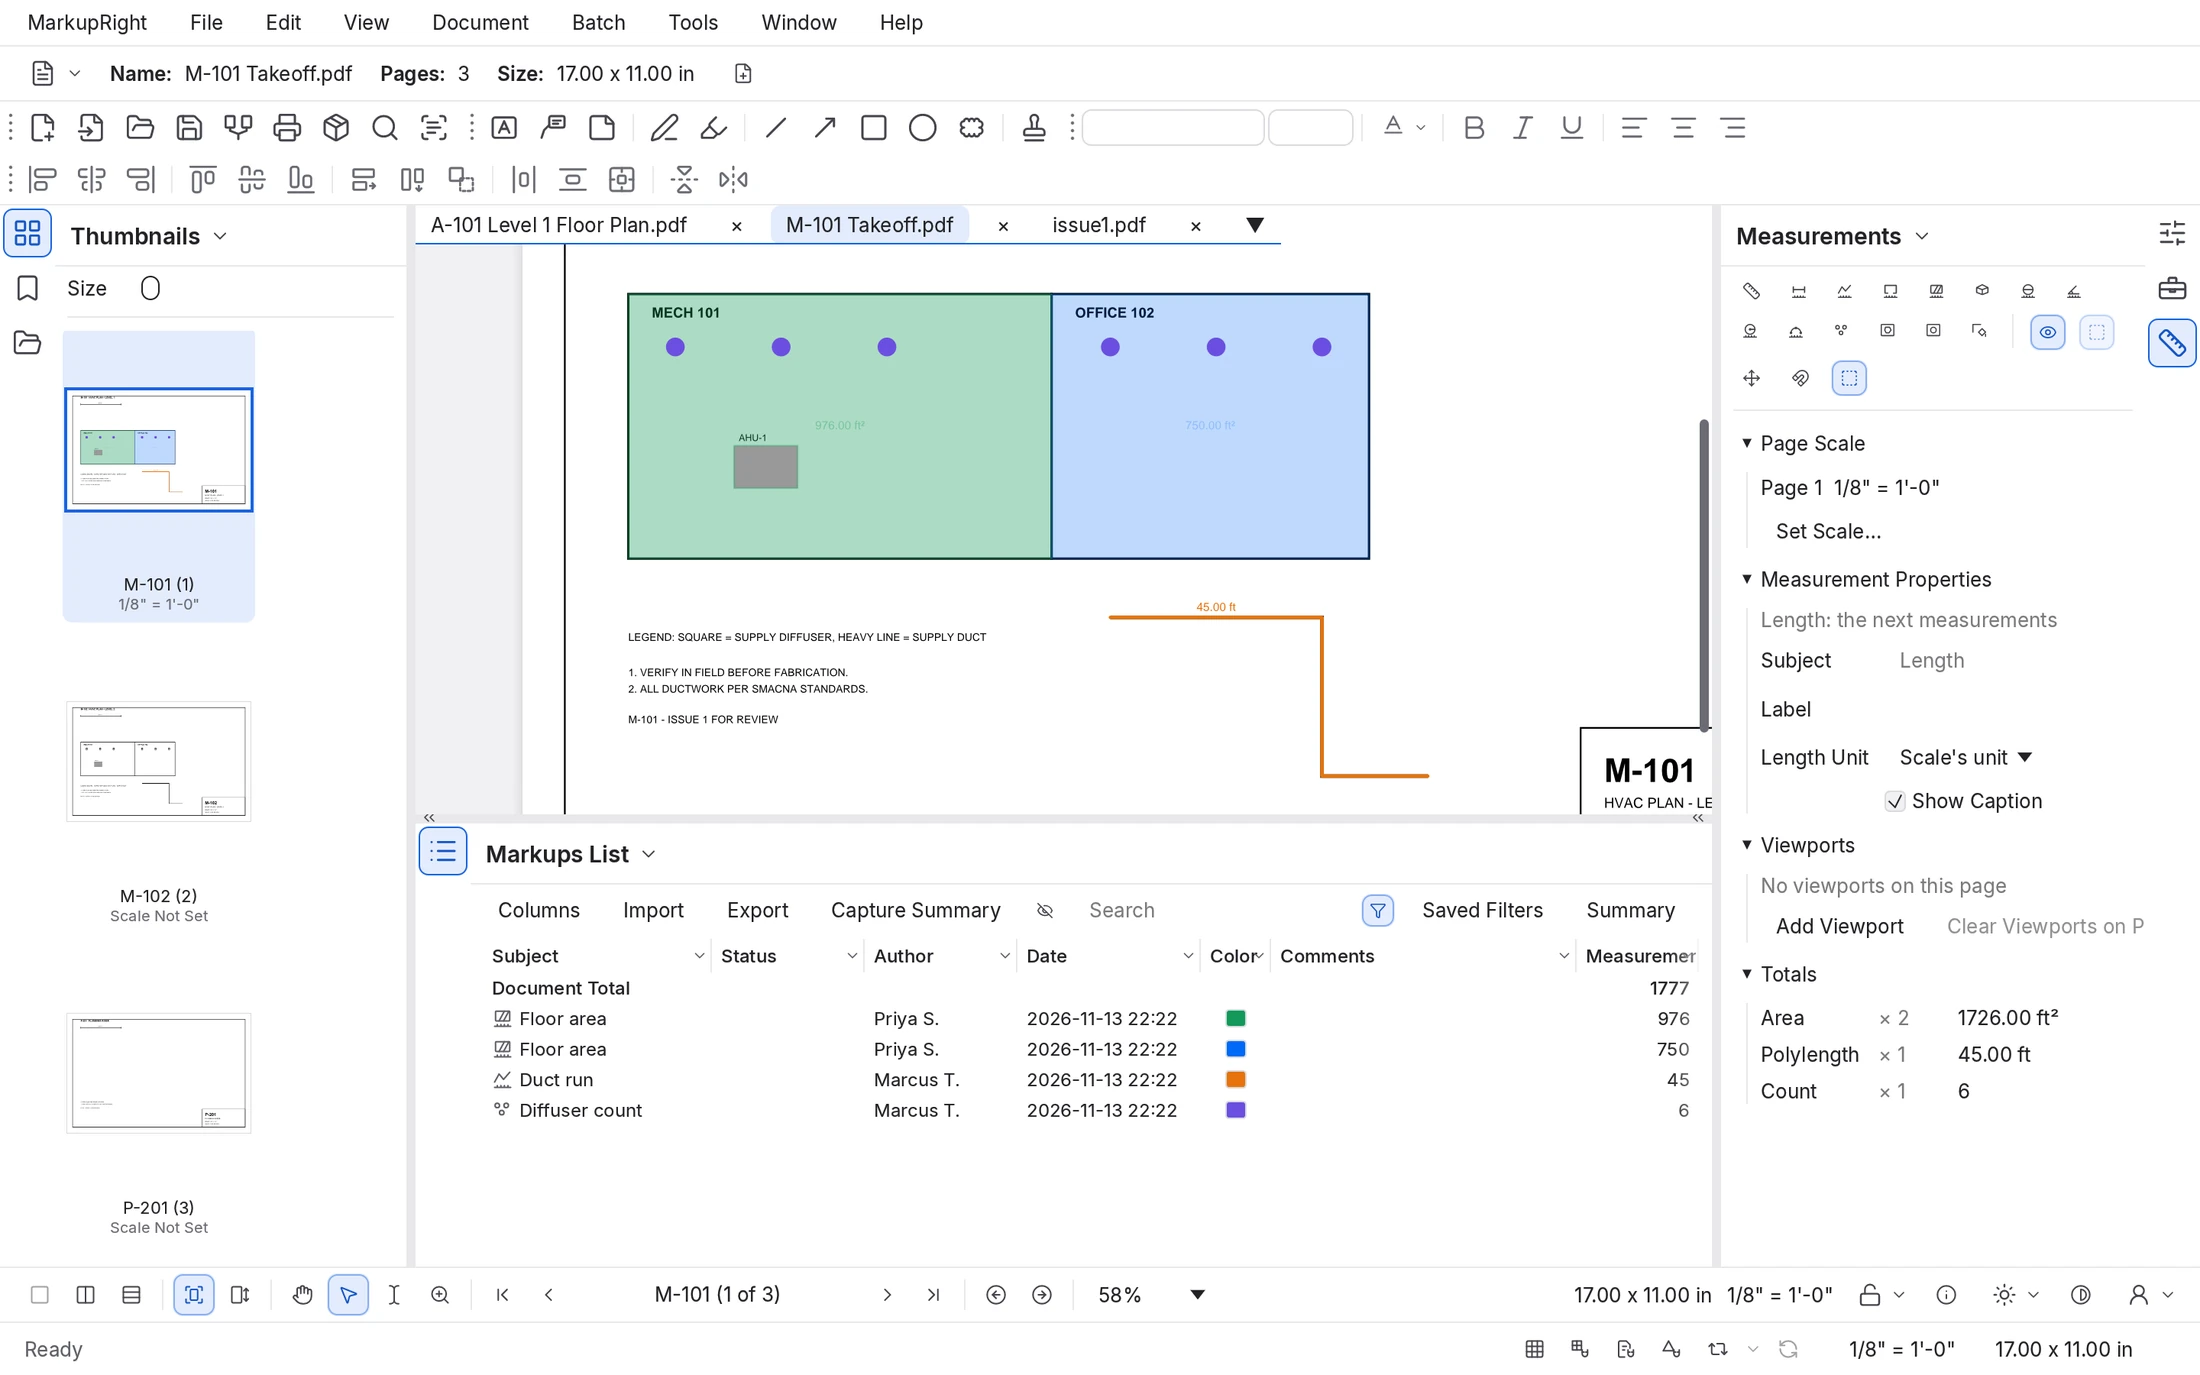
The room fills with colour and shows its area, for example 595.84 ft².
 1
2
3
- Measured areas show their value on the drawing.
- The Measurements panel adds up everything on the page.
- The Markups List shows each measurement, with a document total.
7. Stamp the sheet
- Choose Tools ▸ Stamp. The first time, the menu offers Add the Starter Stamps: choose it to add six ready-made stamps (Approved, Reviewed, Revised, Rejected, Draft and For Construction).
- Choose Tools ▸ Stamp ▸ Reviewed.
- Click on the sheet where the stamp should go, or drag to size it.
8. Review the Markups List
Press Alt+M. Every markup you made is a row, with its subject, author, date, comments and measurement.
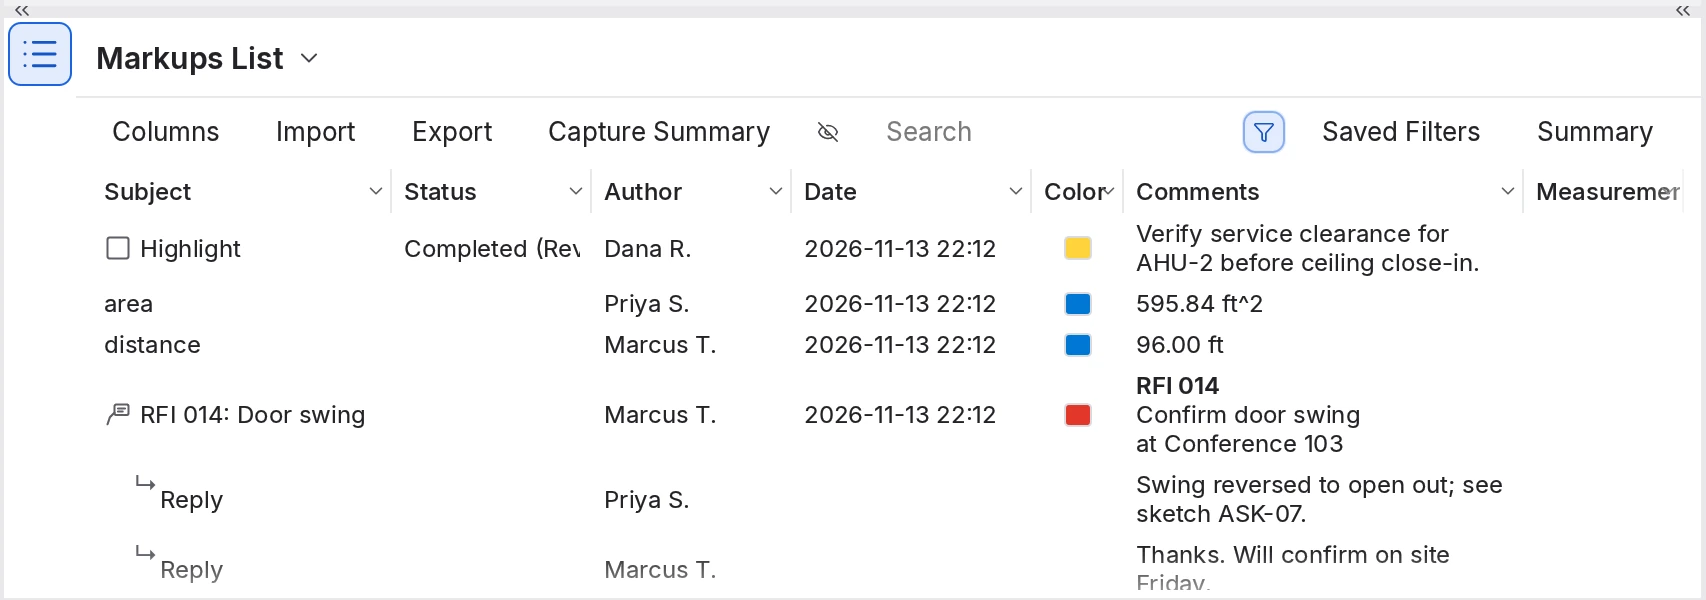
- Right-click the cloud's row (or the cloud itself) and choose Set Status ▸ Review ▸ Accepted.
The Status column shows Accepted (Review), and the markup records who set it and when.
- Right-click the callout and choose Reply... to answer an RFI in its own thread.
9. Save and share
- Press Ctrl+S.
The dot after the tab's name disappears: your markups are saved in the PDF.
- Send the PDF as usual. Colleagues see your markups in MarkupRight or any PDF viewer.
- Want a report? In the Markups List, choose Summary ▸ PDF, then OK, for a printable table of every markup with thumbnails.
While a document has unsaved changes, MarkupRight saves a recovery copy every minute. If your computer crashes, you'll be offered your work back the next time you start. See Troubleshooting.